Get started with Contact Boss CRM using step-by-step guidance for managing contacts, organizing groups, sending emails, creating reminders, tracking activities, and using powerful tools to streamline communication and relationship management.
Get started ↗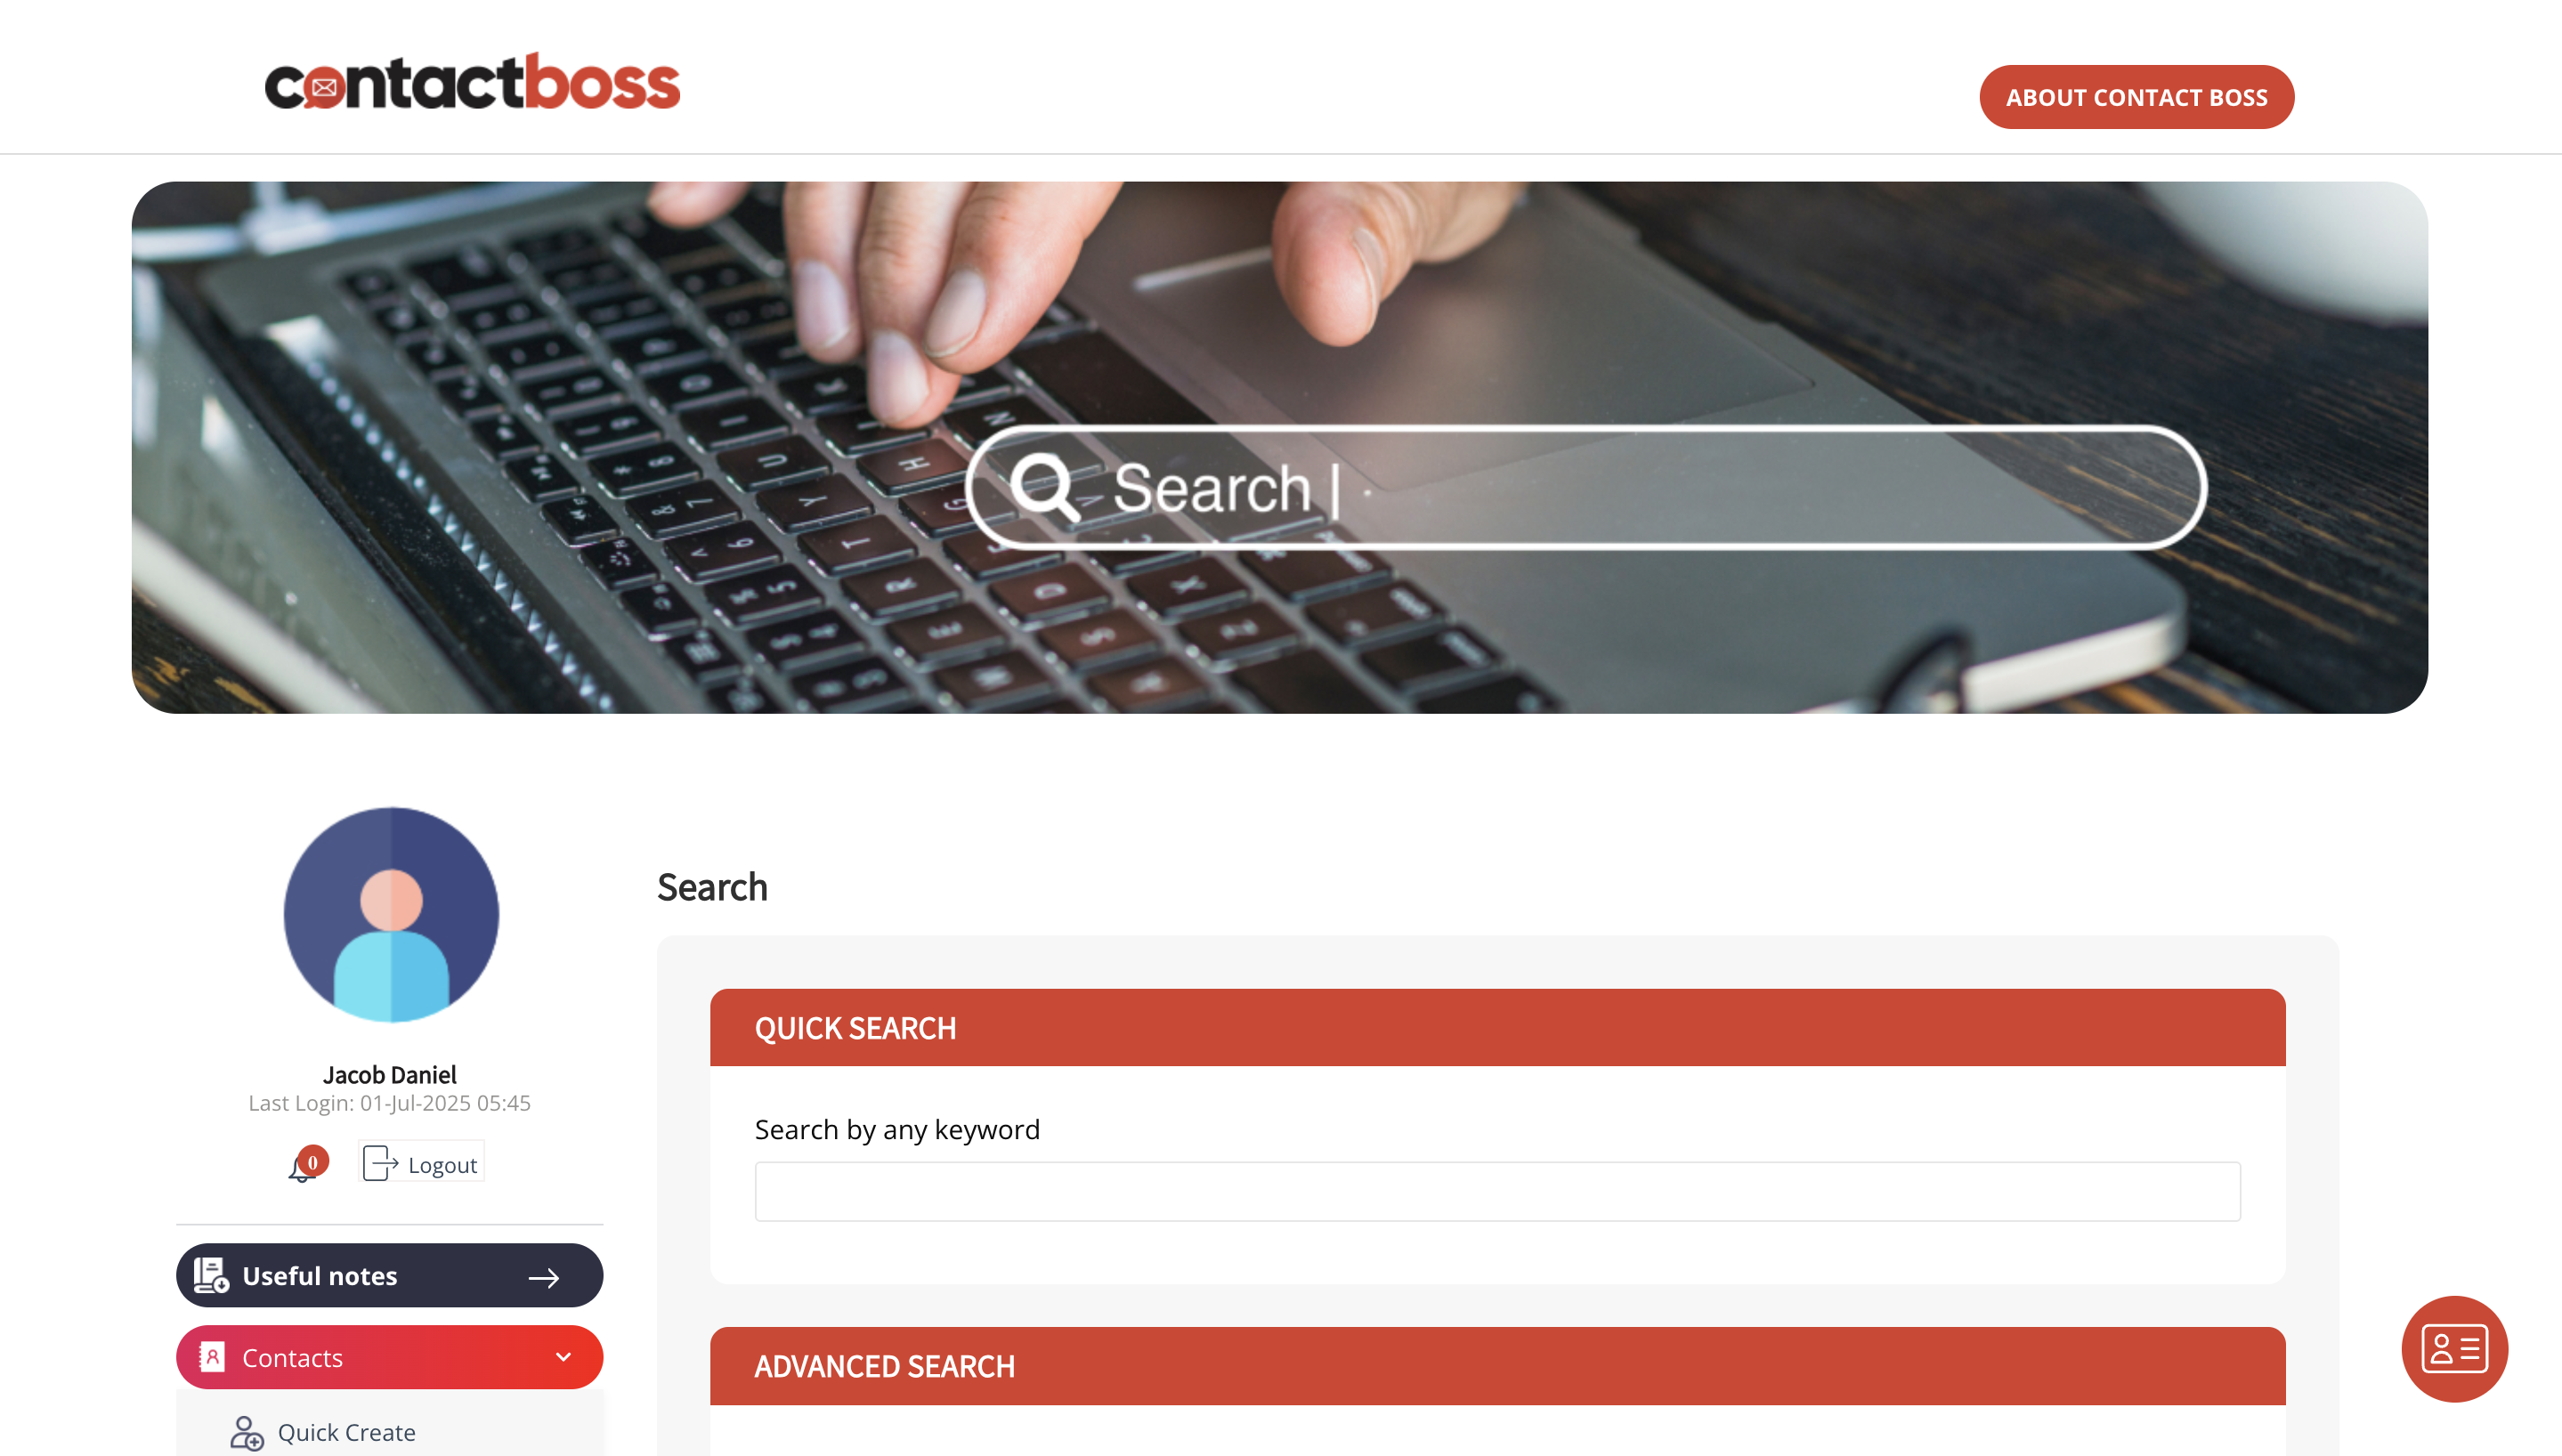
Getting started with Contact Boss CRM is easy. Contact Boss has powerful tools to help you keep in touch with the contacts you’ve worked so hard to acquire. To make the most of your Contact Boss subscription, try out all features, check our FAQs and the tips in our Help Docs in this easy starter package.
Every time a person interacts with your organization, they can be entered into your contact database. You can add:
This means you’ll have ready access to all the people who are important to you:
To enter new contacts into your contact database, you can either use the <Quick Create>, or <Create > function.
The <Create > function allows you to enter more detailed information about your contact, whereas <Quick Create> allows you to quickly enter basic information only. In either case, you have the ability to add more detail to your contacts at any time.
To Create a contact, select either the <Create> on the left hand menu, or choose the <Quick Create> red button on the lower right corner of the page.
Contacts entered with the <Quick Create> option can always be edited later to include much more information.
Next, select the <Type Of Contact> from the drop down menu of pre-existing contact types.
Enter your contact’s details. Include as much detail as possible to make future searching easy.
Click <save>
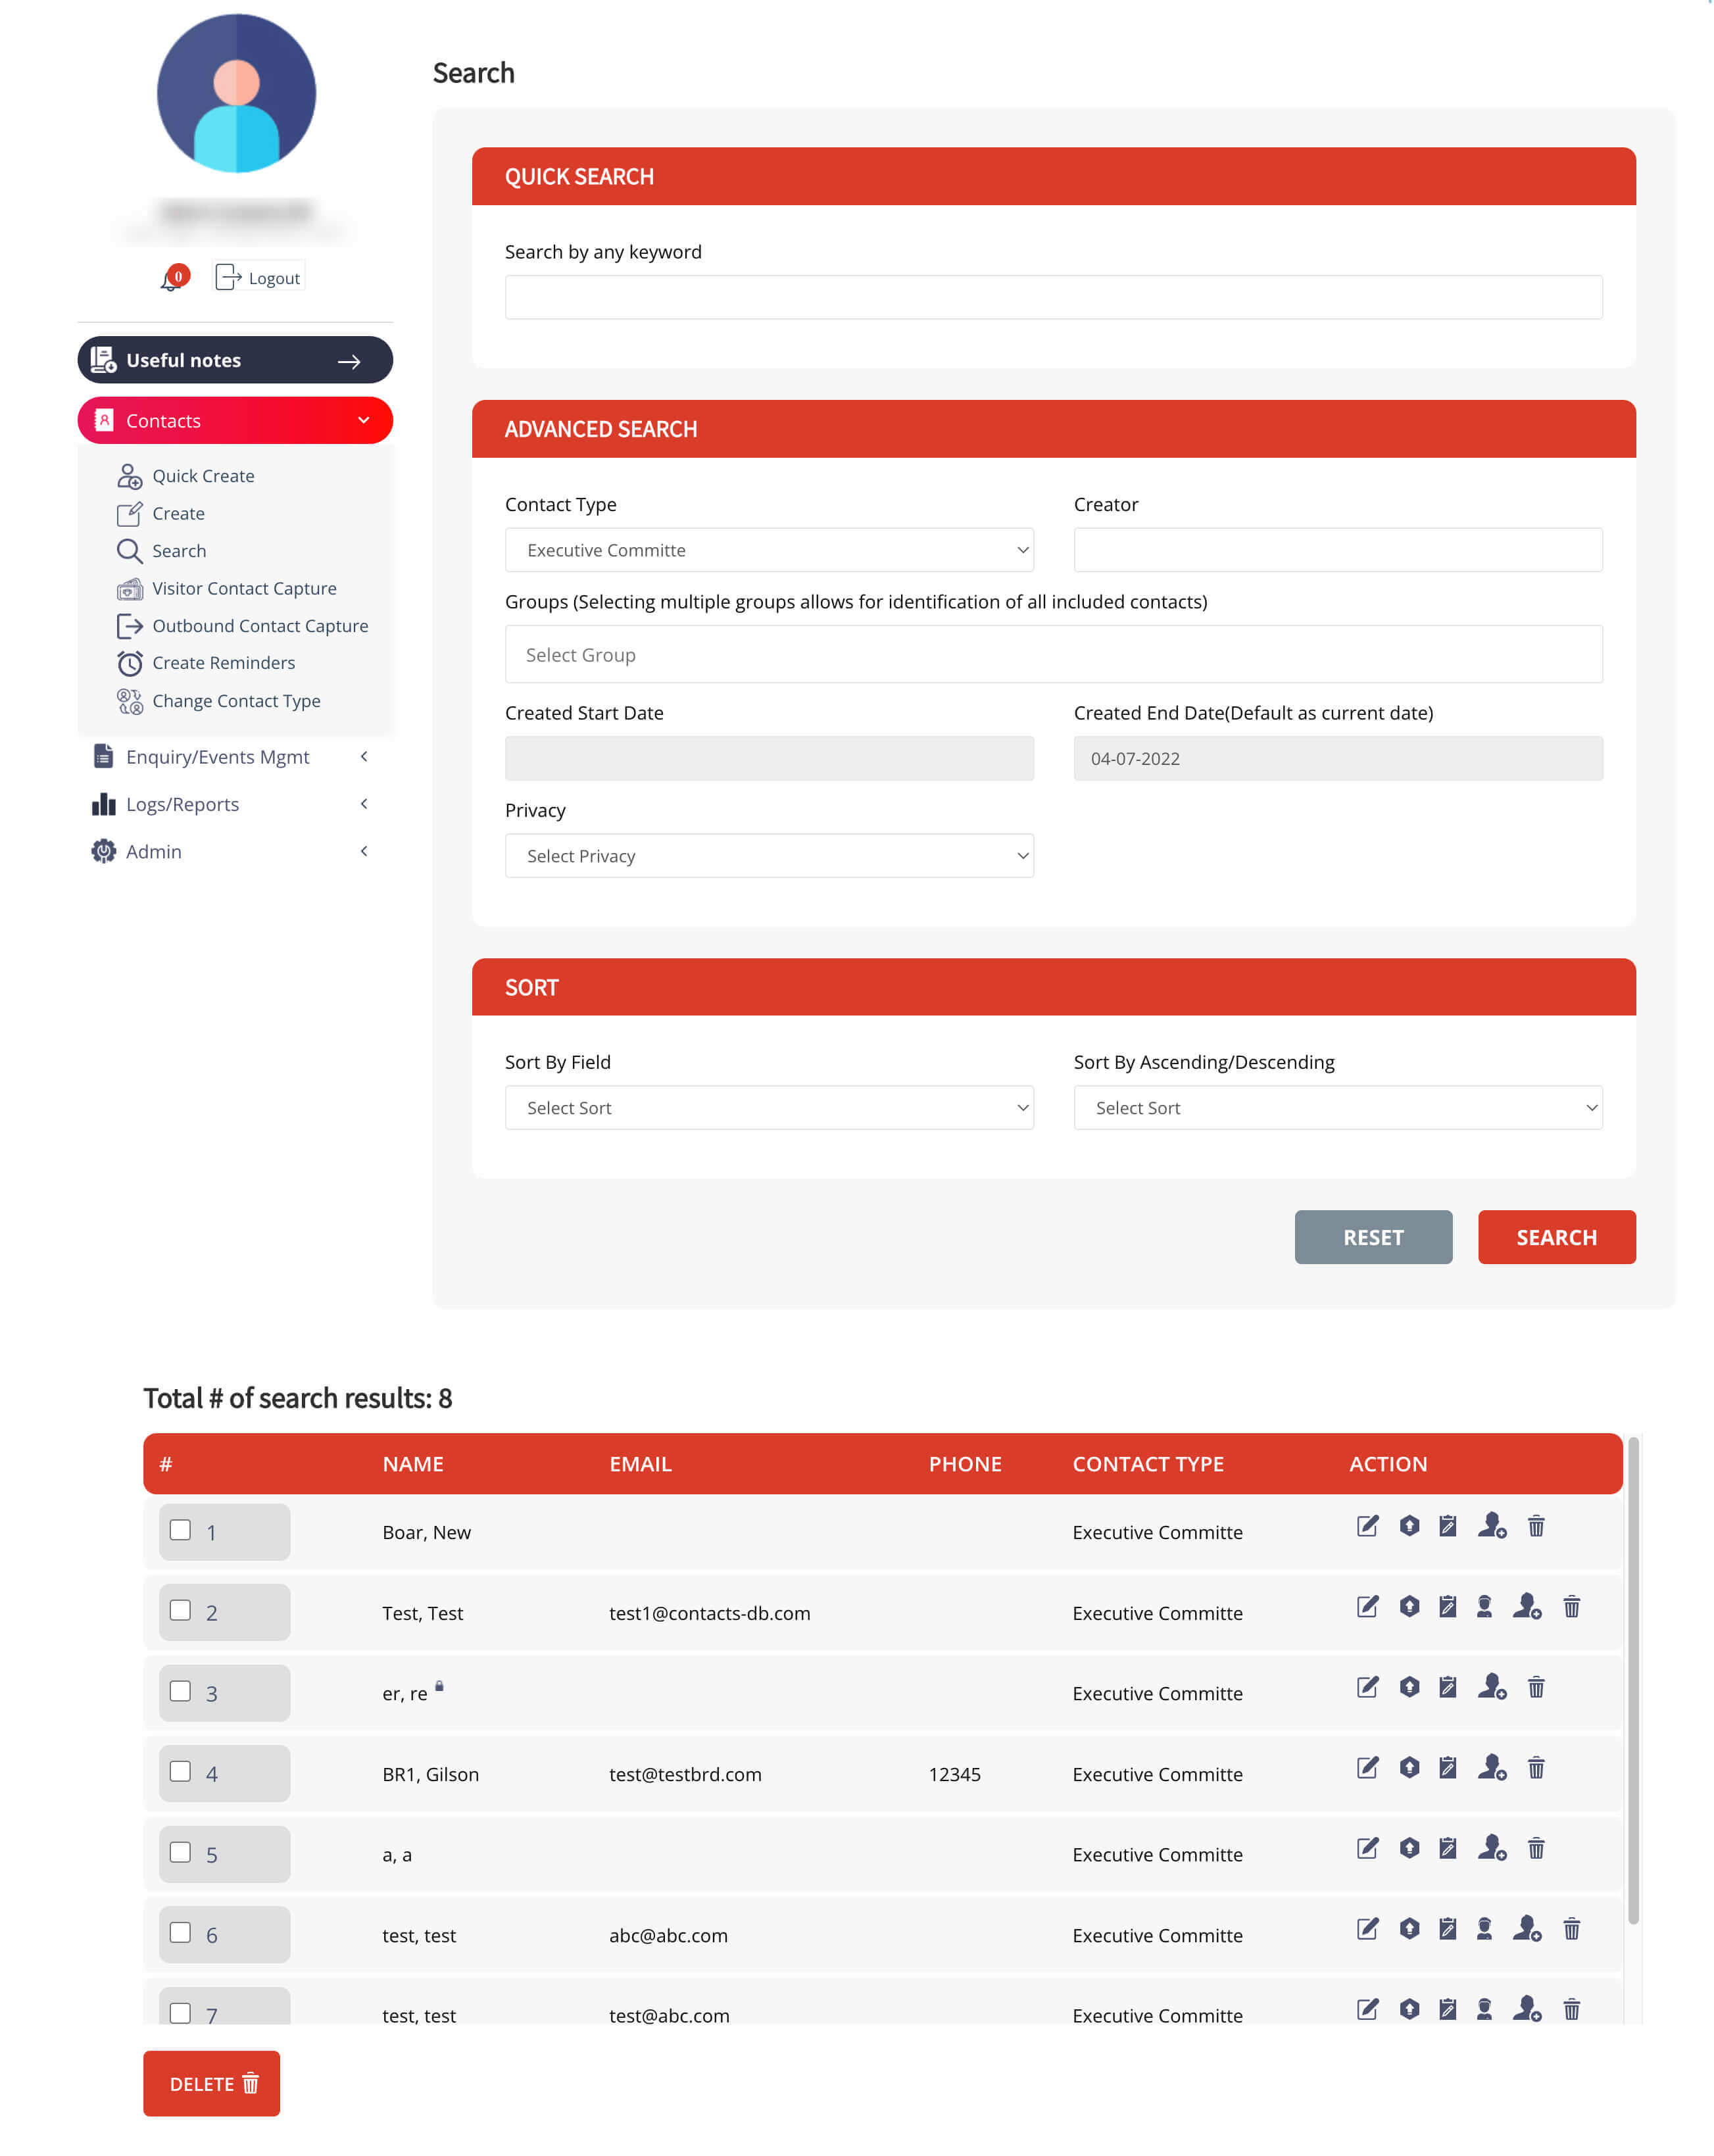
Searching your database is easy with Contact Boss. Our robust search tool allows you to search by first or last name or by date, keyword or comments.
You have two easy means of searching the database - the first is a very simple <Quick Search> option which simply requires the insertion of any keyword which will help you find the contact quickly.

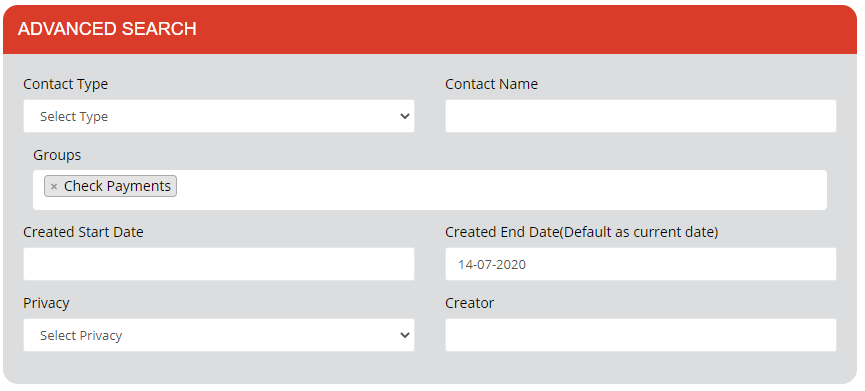
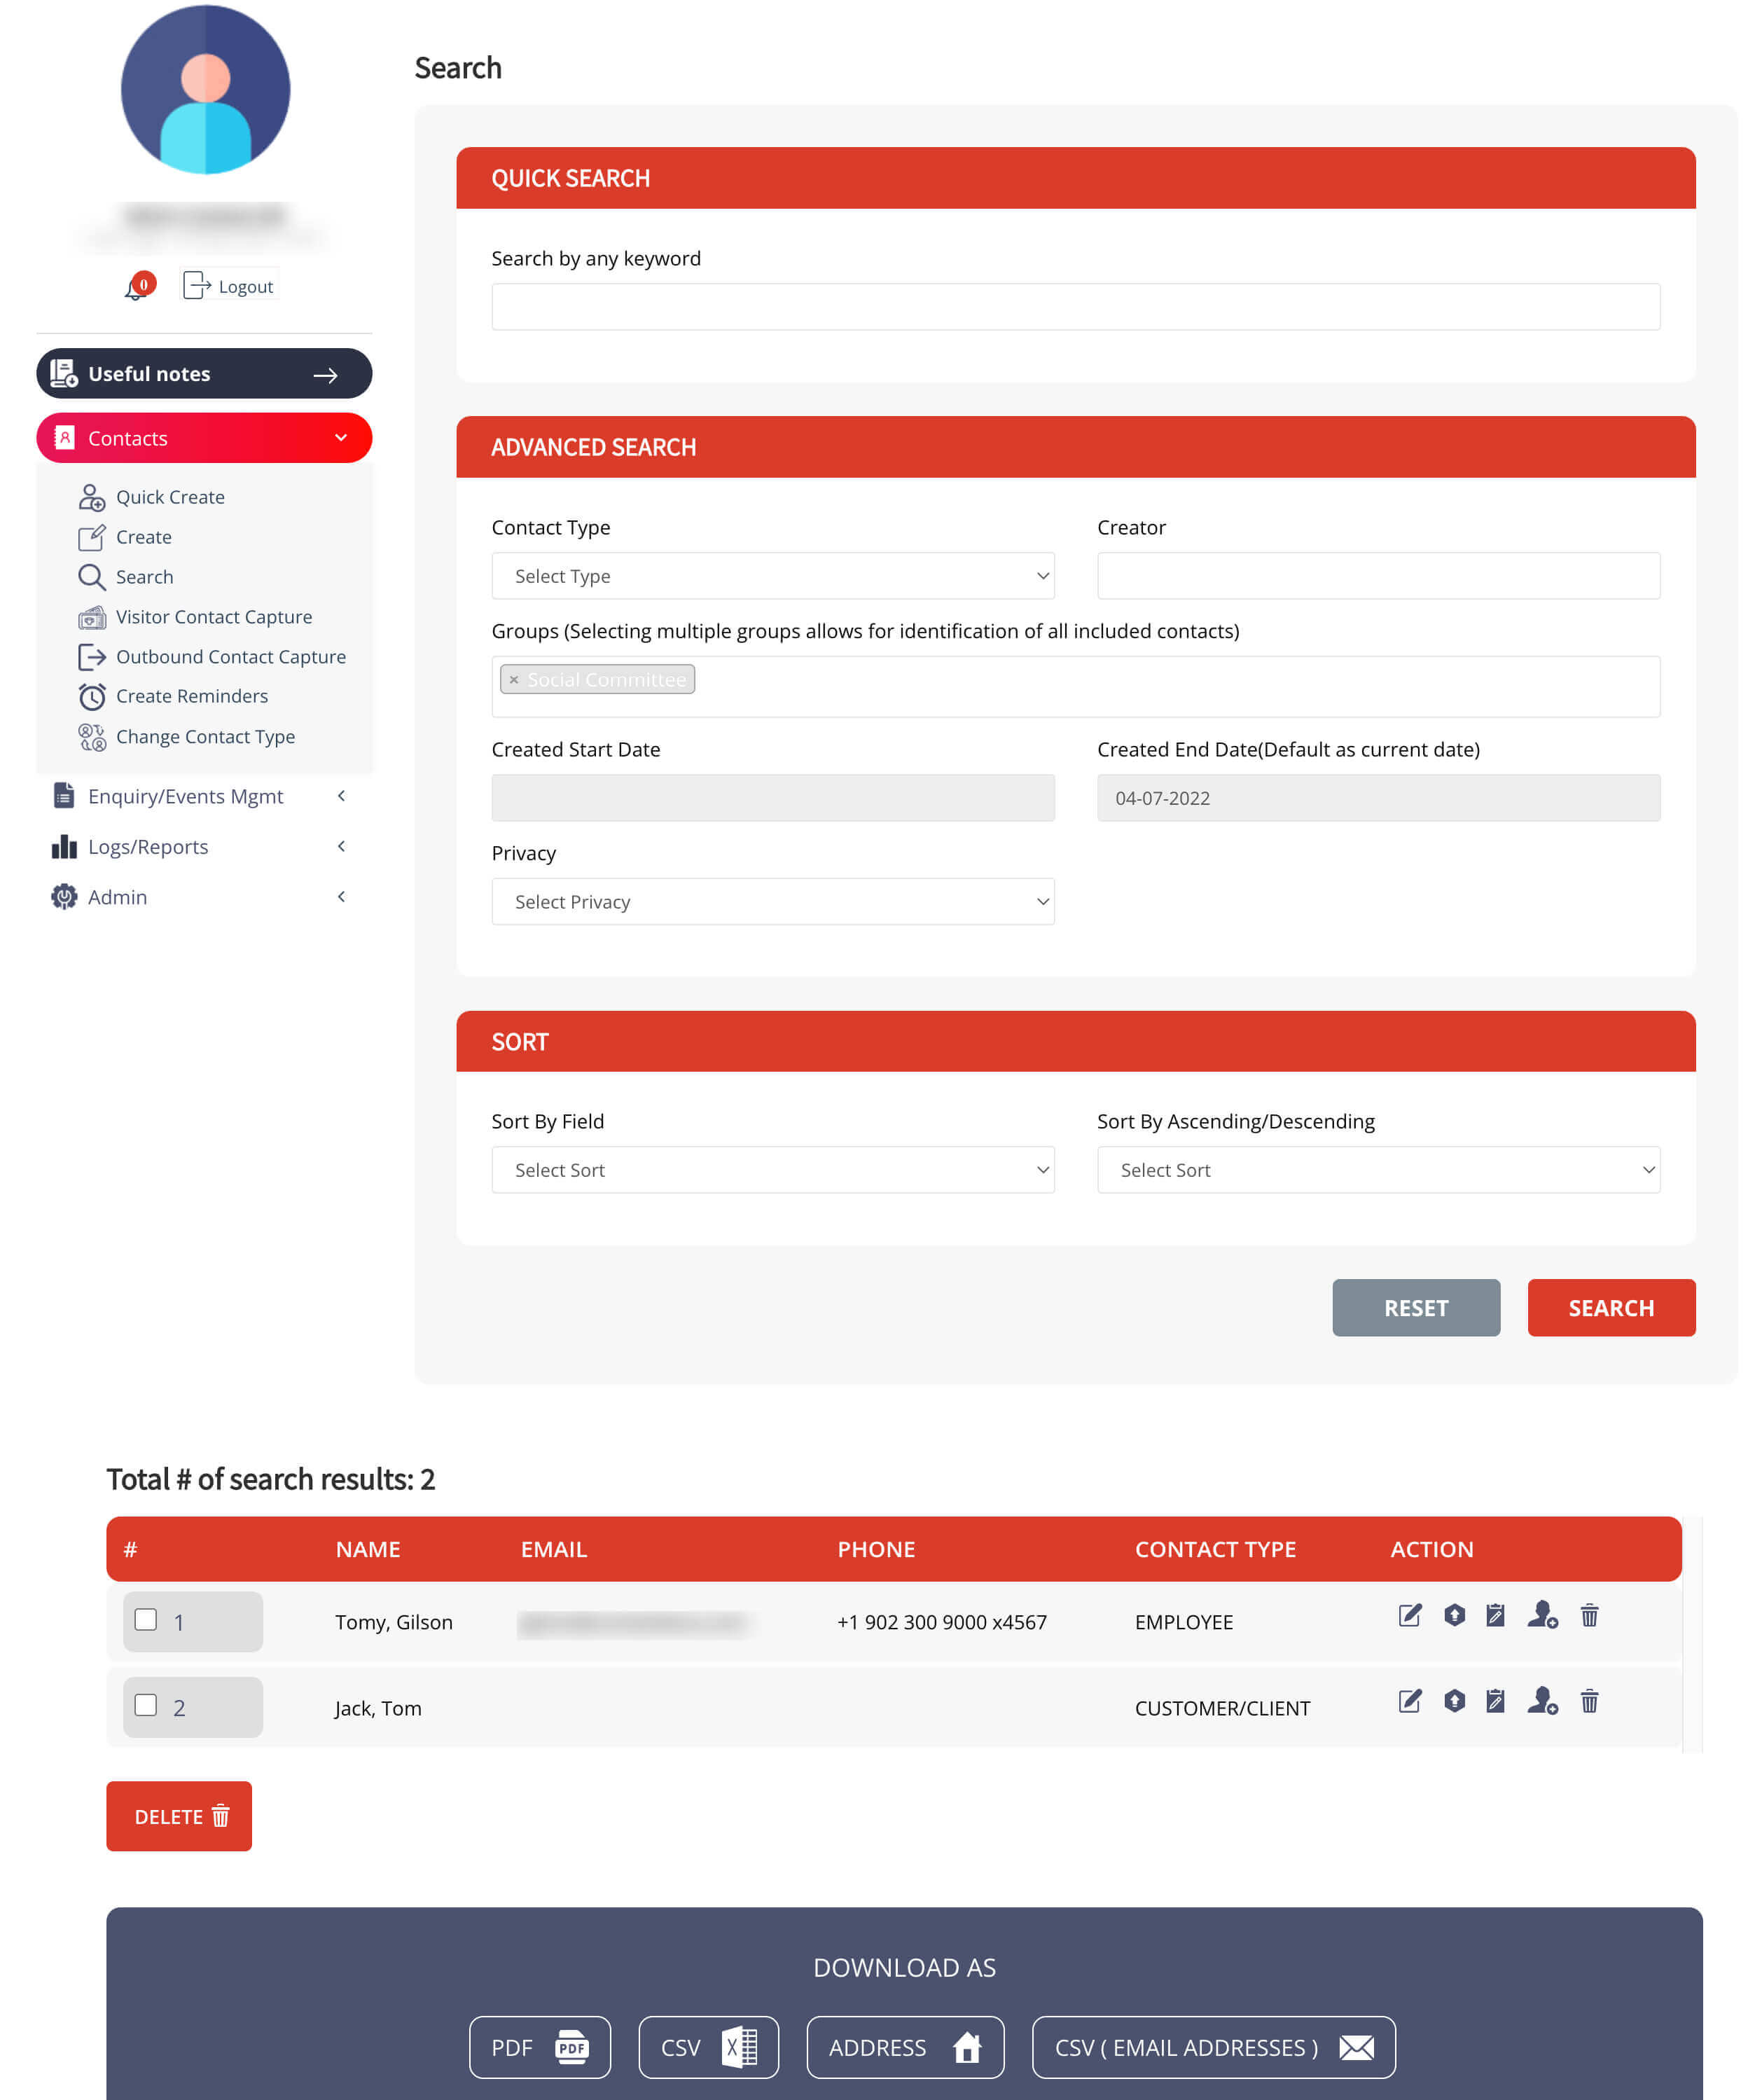
With the <Advanced Search> you can also search by Contact Type (employee, client, funder etc.) or by Group (such as contacts who have opted in to your mailing list, or other groups you have created). As an added benefit, you can search your Groups, and create your custom mailing list by combining more than one Group in your search. Thus you could generate a list that includes contacts from two or more Groups! Using these search categories, you can develop a useful customized list of contacts, ready for your next outreach or communication.
The secret to the Contact Boss search tool is that it searches across multiple data layers, which means you can locate a contact by any details you enter. You can even search based on any personal details you may have recorded, such as who introduced you. Additionally, you can locate records by details such as comments in the notes filed, who created the record, or the privacy level, as some users are able to create private records of contacts if desired.
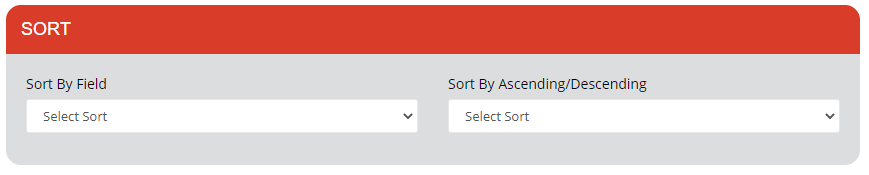
When your list has been created you can <Sort> by Name, Contact Date, or Contact Type.
Please note that clicking the “No.” box located in the left of the header will select all records and for Admins with permission they may use this “select all” box to delete all contact records in the list. It is not necessary to use the check boxes to select the names you wish to include in your mailing list .
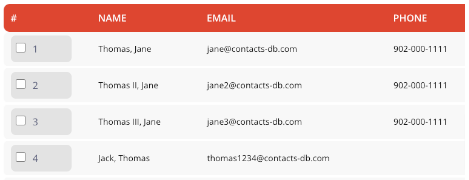
This is also a moment when you may wish to <Edit> the record (using the “pencil” edit icon on the right); add a document with more information by using the “upload” icon; or find out who added the name to the list by clicking the “head” icon. It is also possible at this stage to give the contact access to Contact Boss by clicking the “create login” icon, or you can delete the contact simply by using the trash icon to the far right. Be careful you do not delete records that you wish to keep!
Once you are satisfied with your list you are now ready to download, either by generating a PDF, a CSV file, or mailing label format. Or you may decide to export the email list directly to Gmail or Yahoo, which is easily achieved simply by clicking on the icons. All the contacts in your list will be transferred to the format you choose.

If you think you might be missing some key contacts in the list you generate, it is easy to make use of the <Quick Create> button on the bottom right and add names on the fly. (show symbol).
When creating new contacts, it is often convenient to transfer the details to your address books (i.e. Microsoft Outlook or Google Contacts). Once your contact is created in Contact Boss, simply select the Zapier icon and transfer to your preferred address book. Please note that each individual contact transfer will count as one task in Zapier.

Contact Boss is a very flexible tool for managing your contact data, with more than one way to organize your contacts. To explain: When you first create a contact record you are invited to select <Type> from a drop-down menu. There are 10 “Type” options (including non-categorized) but if at some point you find that the Type you have selected is not suitable you may be able to Change Contact Type (switch a current contact from one Type category to another - with some limitations) or Rename Contact Type (creating custom contact types according to your company needs).
Contact Boss also offers the opportunity to organize your contacts into Groups – allowing you to sort your contact data into useful groupings such as the names of everyone on your budget committee, or all those who are interested in the hockey pool or your event organization committee etc. Note that the Groups that you create can include contacts from any contact type. For example your “Social Committee” Group could include names from Employee, Board and Volunteer contact types. Names from any of the Contact Types you are using can be included in the Groups that you have created.
Your work life could become so much more convenient if you take advantage of the option to Group your contacts! For instance you might wish to bring together all your contacts related to the food industry - for this Group you could include contacts from several Contact Types such as Suppliers, Clients and Employees. Perhaps a “Tech” Group would be helpful - simply collate the relevant Contacts from as many Types as you wish to generate your convenient Tech Group whereby you can communicate easily with this group which could be made up of your two IT employees plus three “Supplier” representatives of your website management company.
From a marketing perspective you will want to group customers who are either first-time purchasers, or those who have made more than one purchase - Contact Boss is especially powerful in that it can search and filter across both your Groups and Contact Types, giving you a thorough and useful search result that many other CRMs are not capable of. Another great marketing option would be to create a combined search of a Group you have created (such as apple producers or homeowners ) plus Contact Types such as Customers and Clients within a specific geographic region such as US Northeast.
Perhaps a Group to handle concerns of a “Legal” nature would be useful - just add relevant internal Employee Contact Types along with external legal Supplier contacts. Does your office have a fun softball team? Other examples for combined searches might be 'Clients' and 'East Asia' Group or Suppliers and 'Apple Producers’ Group or Clients from East Asia (or) East Africa Groups or Board Members from ''Europe IT Companies.' It’s easy to communicate practice and game times with Employees along with external contact Suppliers who book your field or Funder contact types who sponsor your jerseys!
In summary, the Contact Boss “Group” option is a very flexible tool that can ease your day-to-day communications and ensure your business operations are as efficient as possible!
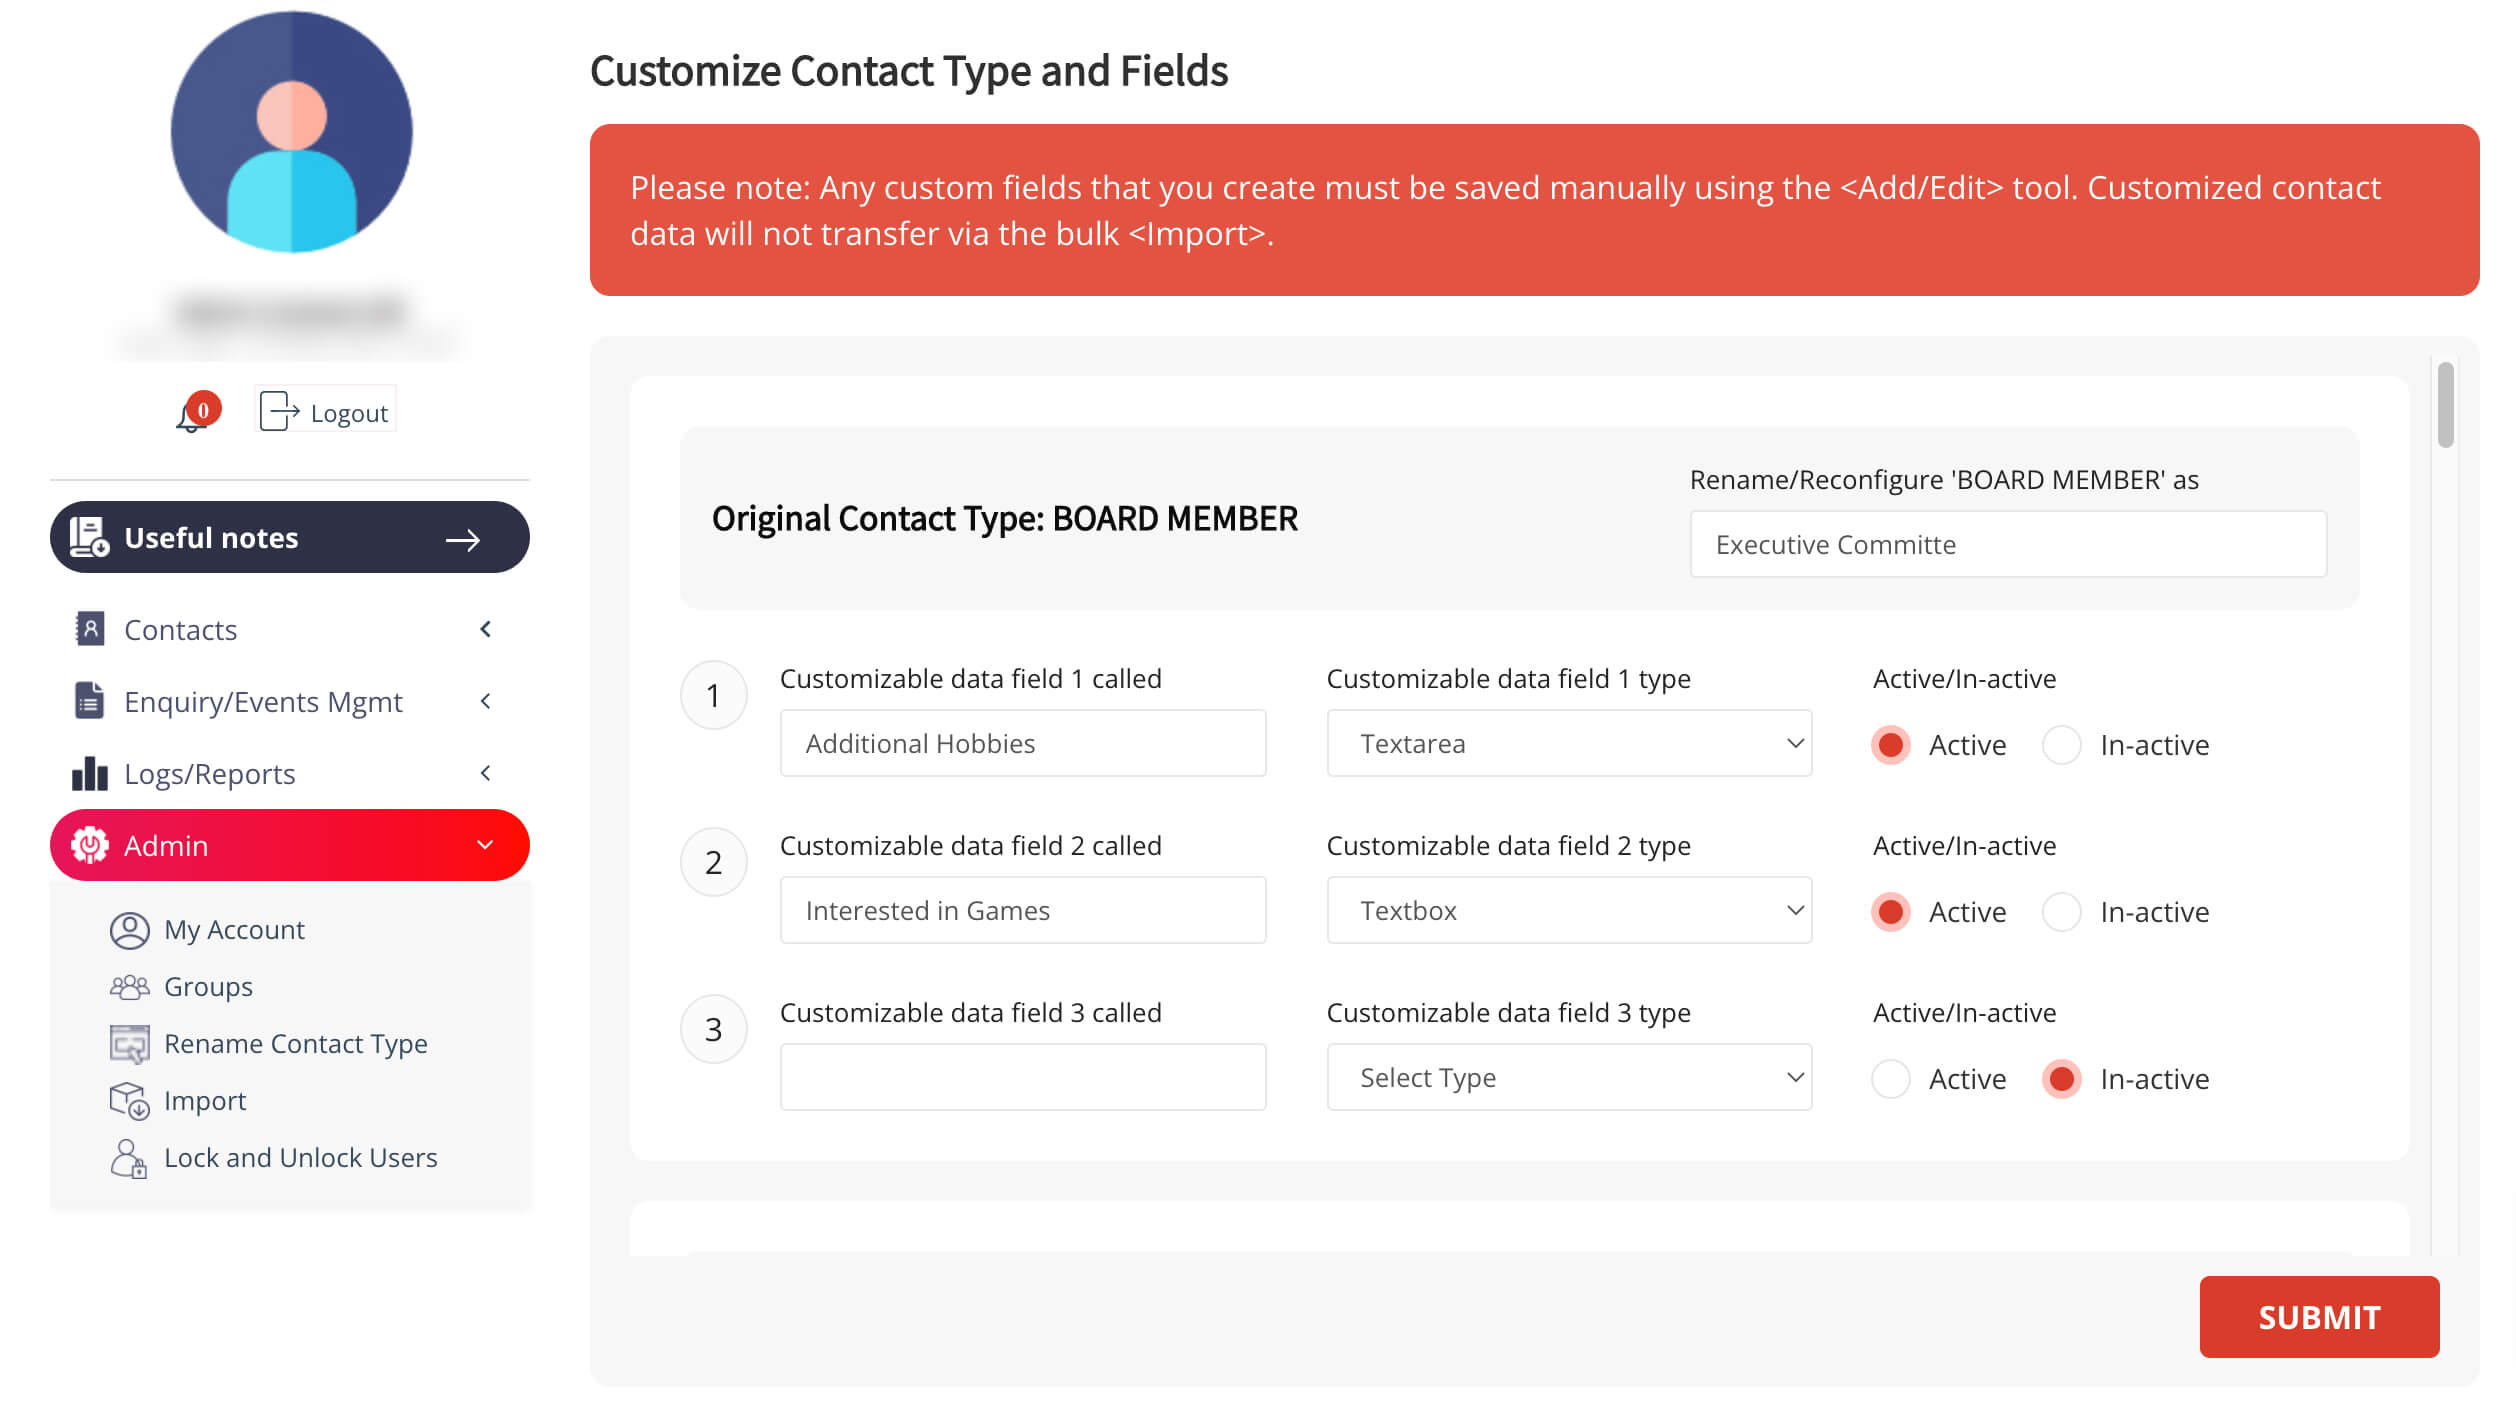
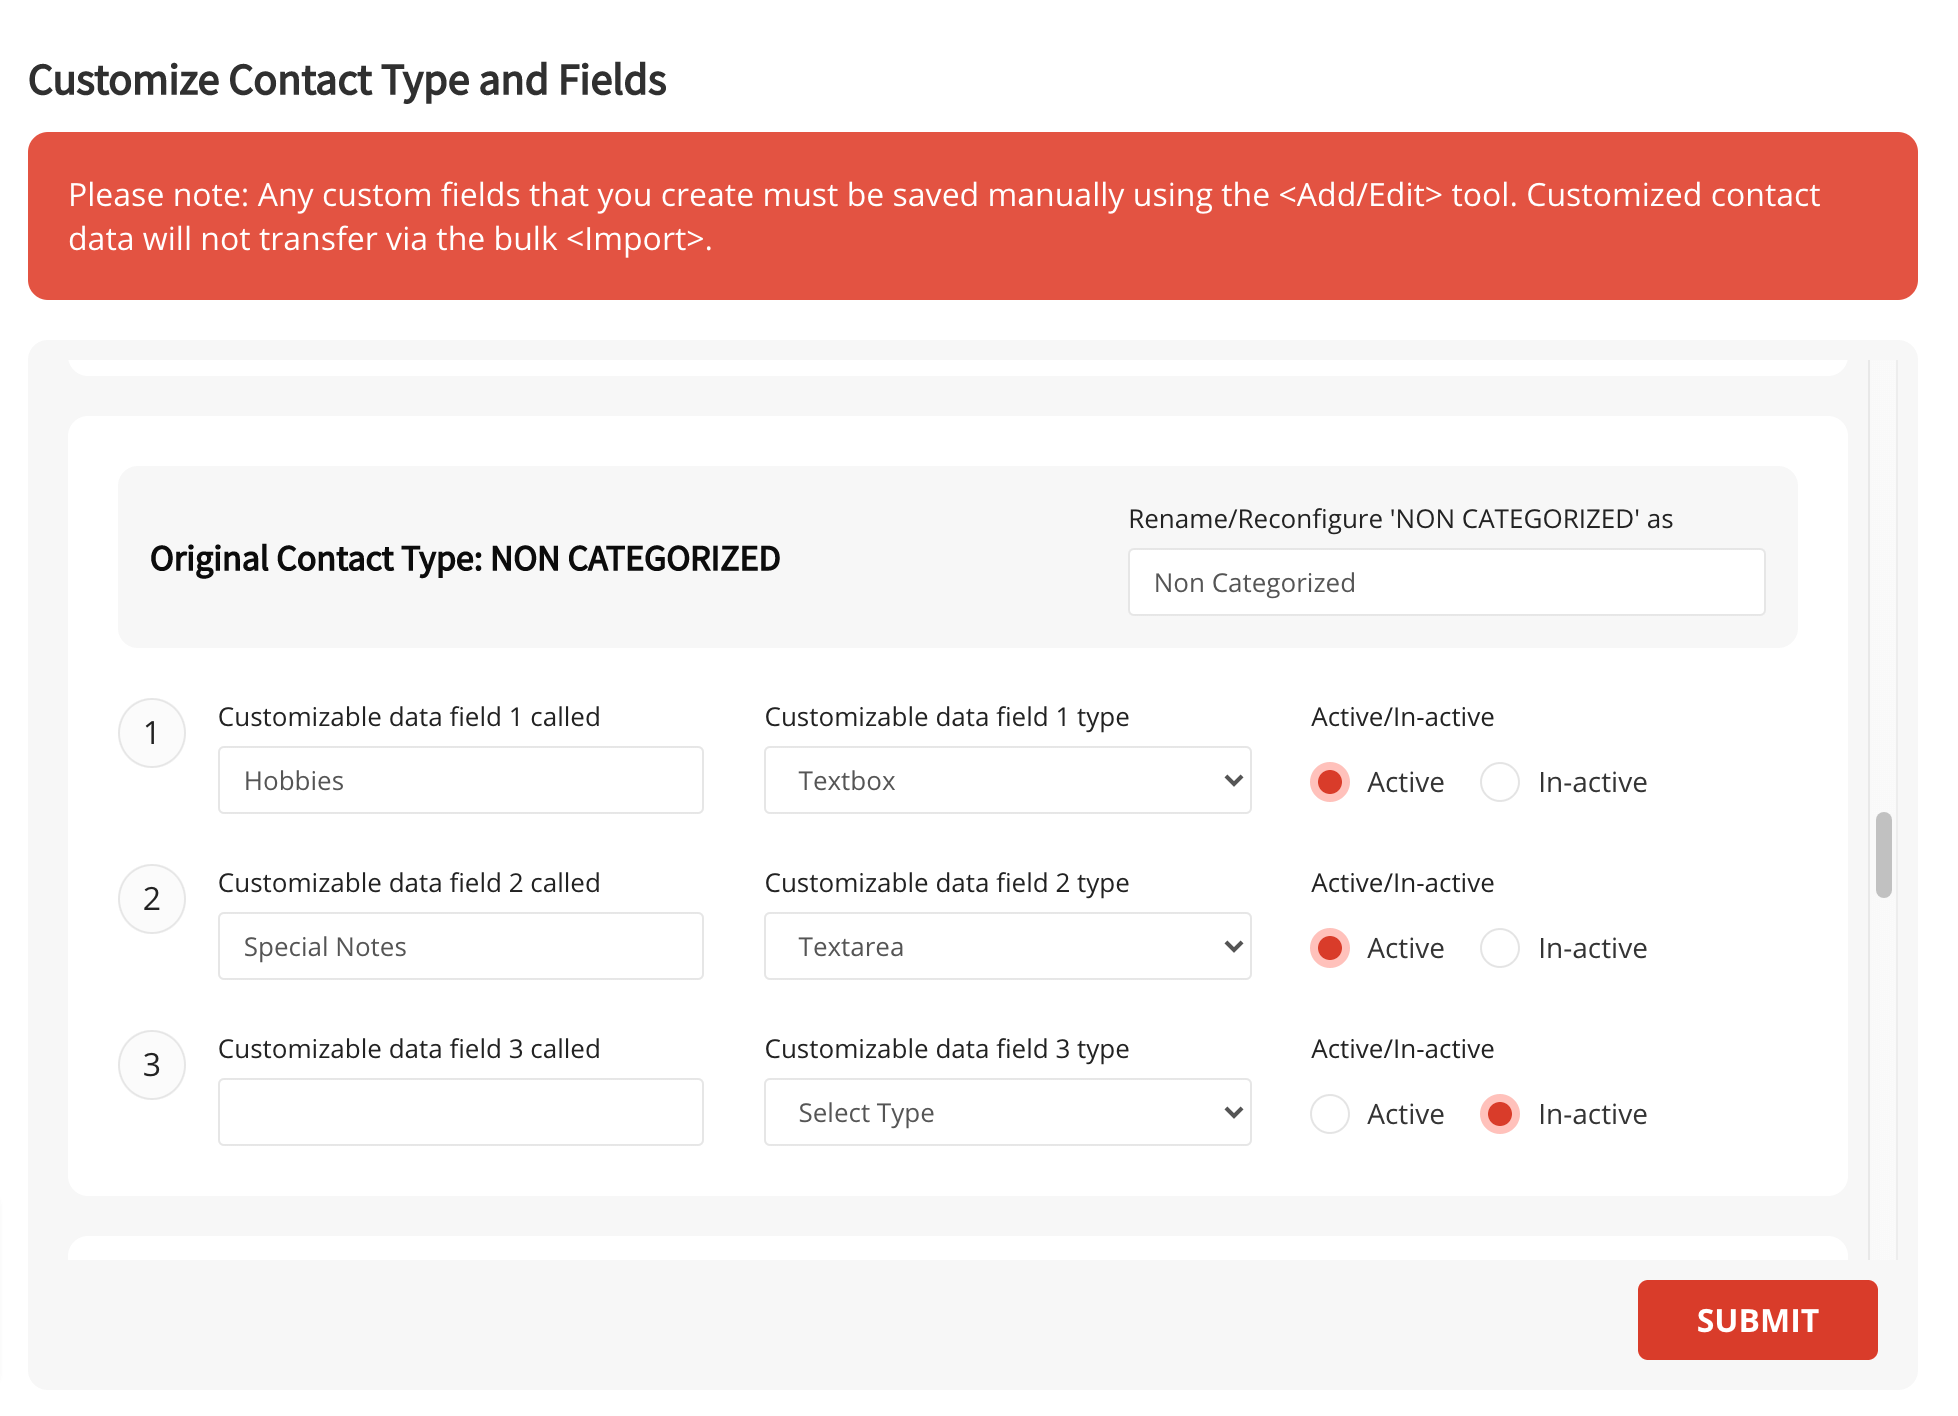
We realize that every organization has its own individual operational needs. Contact Boss offers ten types of contacts in the dropdown menu, but if you would like to replace some of those contact types to suit your own operation you can rename “contact type” fields to better fit specific requirements. Once you have changed the name of the contact type at the admin interface, that change will be reflected on all the contact types included in the previously named type. Simply go to the <Admin> menu; the standard contact types will be presented and you need only complete the field by inserting the name of your new contact type, thus renaming the previous type.
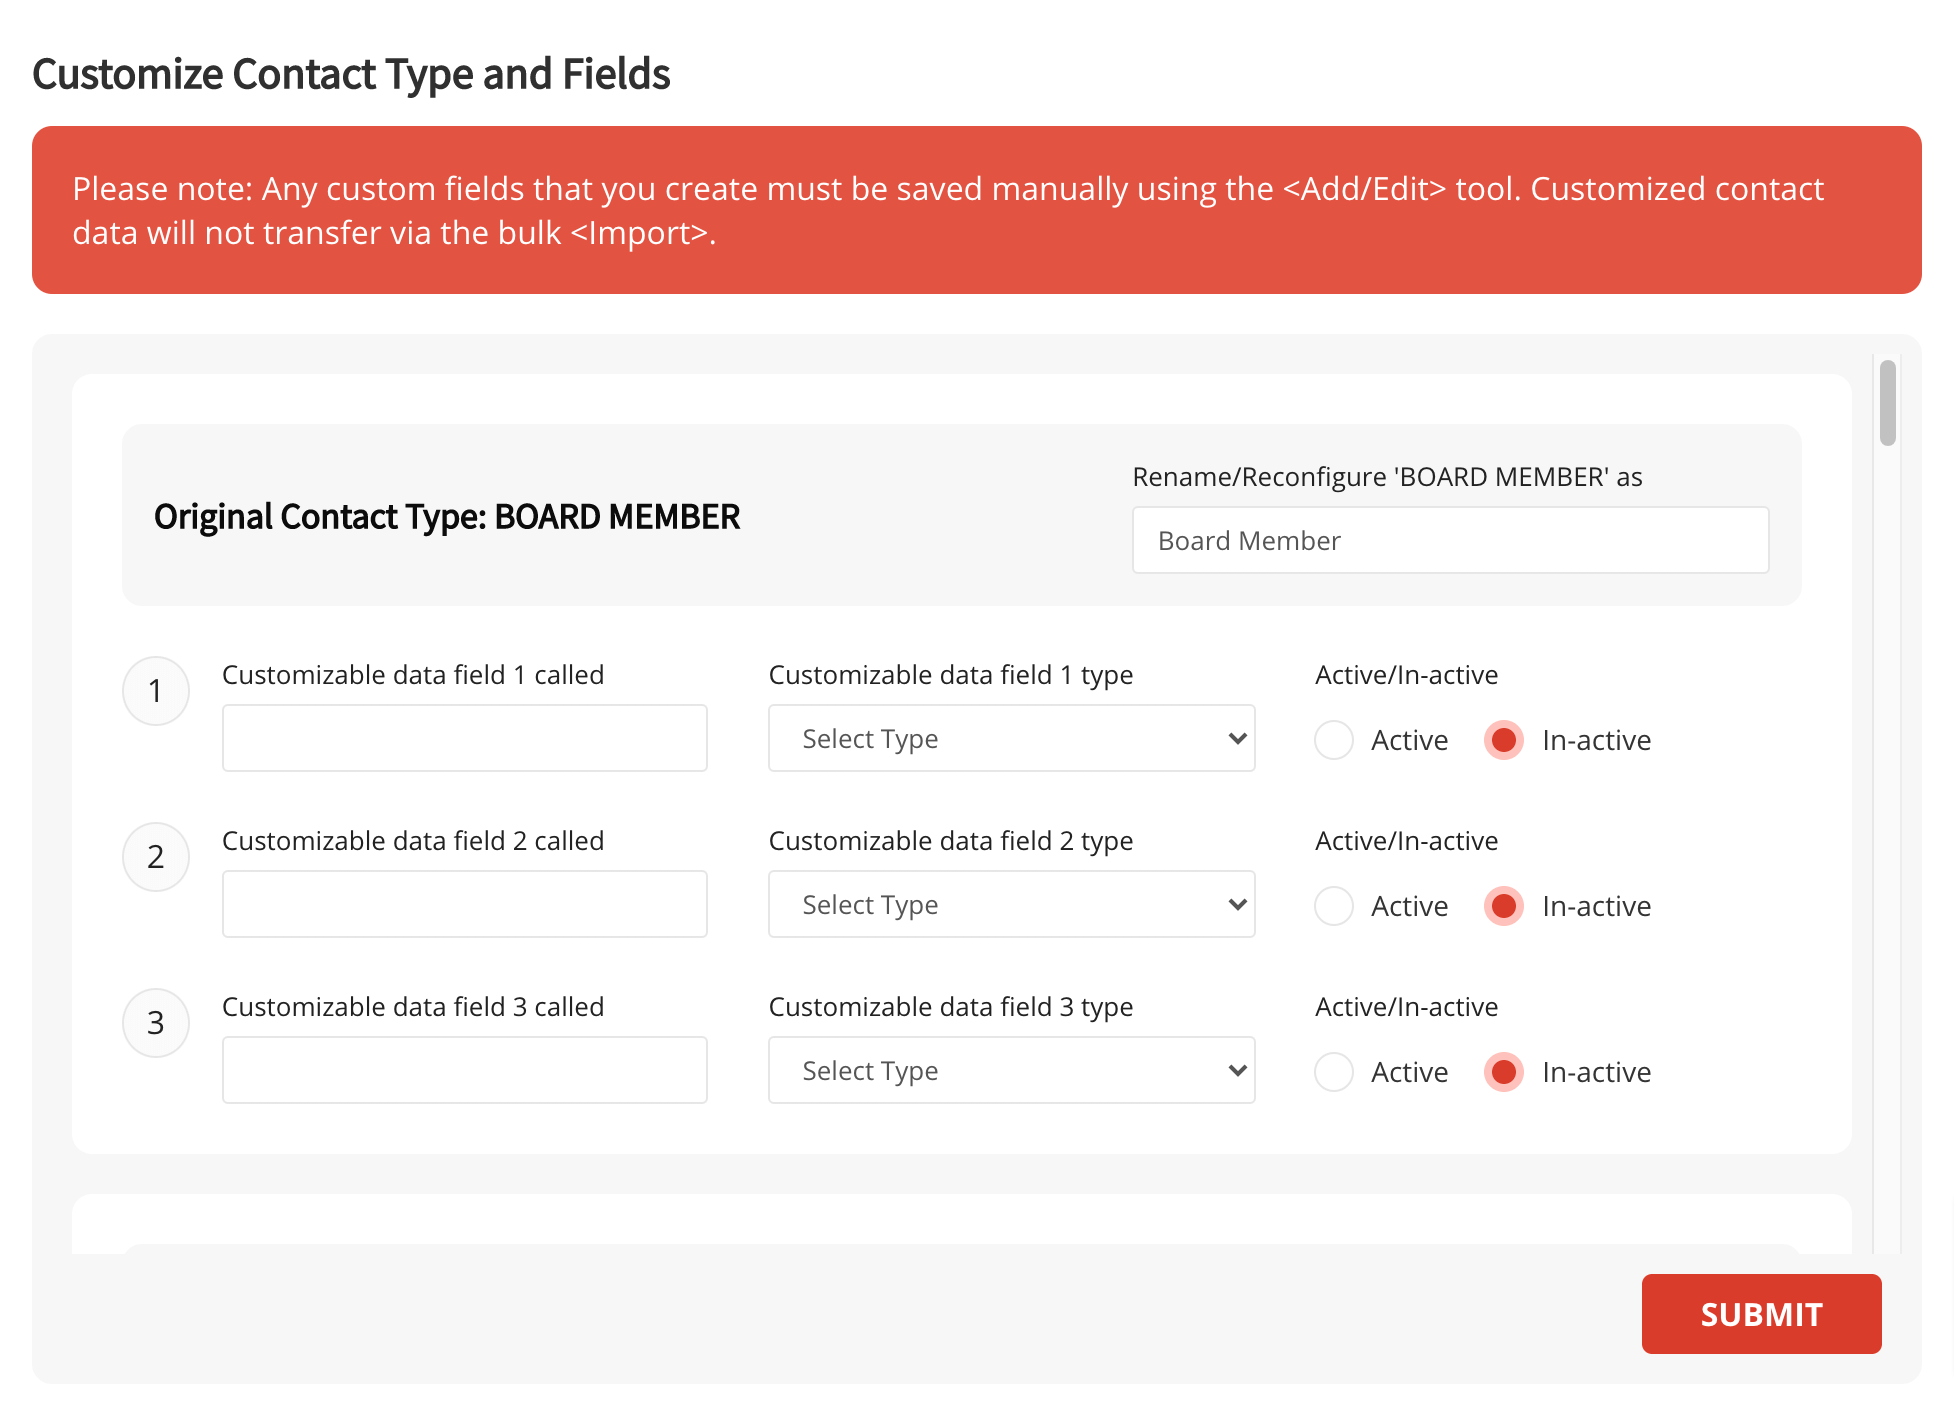
You will notice that you also have the option to add extra fields to your contact data listings. Perhaps you want to add personal notes or more detailed descriptions, such as hobbies, memberships, or education. From the <Admin> menu you can choose to add up to three additional fields for each contact type. As well you can define what kind of field by choosing <text box> or <text area>. If you choose text box it will be a normal form field where you can enter the data similar to first name, last name, etc. If you choose text area you will have long-form field where you can enter more detail (as in the comment box in our contact create/edit screen).
Please keep in mind that your contact data should be imported first, before you make use of the customized “contact type” fields. Once you have imported your data into Contact Boss, go ahead and create the contacts which you will designate as your custom contact types.
Please note: Any custom fields that you create must be saved manually using the <Add/Edit> tool. Customized contact data will not transfer via the bulk <Import>.
At the far right of your search result page you will see a set of icons under the word <Action> . These are very helpful to manage your list of contacts.
Firstly you will find the universal “pencil” sign 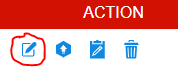 meaning you can edit the list. Perhaps you would like to add a bit of info
like the contact’s birthday, or insert some additional comments. Now is a good time
to update or correct simply by clicking on the “edit” pencil icon, which will direct
to a set of fields which you can adjust as you wish.
meaning you can edit the list. Perhaps you would like to add a bit of info
like the contact’s birthday, or insert some additional comments. Now is a good time
to update or correct simply by clicking on the “edit” pencil icon, which will direct
to a set of fields which you can adjust as you wish.
Next you will note that you can “upload” 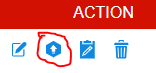 an item to add to the record. Perhaps it is
a resume, or a photo, or a report that the contact has provided. This handy tool
will allow you to keep relevant material directly attached to individual contact
records. You can upload files of format docx., .zip, .txt, .pdf, .jpg, . jpeg, .tif,
.gif, .png, .psd, .ai etc.
an item to add to the record. Perhaps it is
a resume, or a photo, or a report that the contact has provided. This handy tool
will allow you to keep relevant material directly attached to individual contact
records. You can upload files of format docx., .zip, .txt, .pdf, .jpg, . jpeg, .tif,
.gif, .png, .psd, .ai etc.
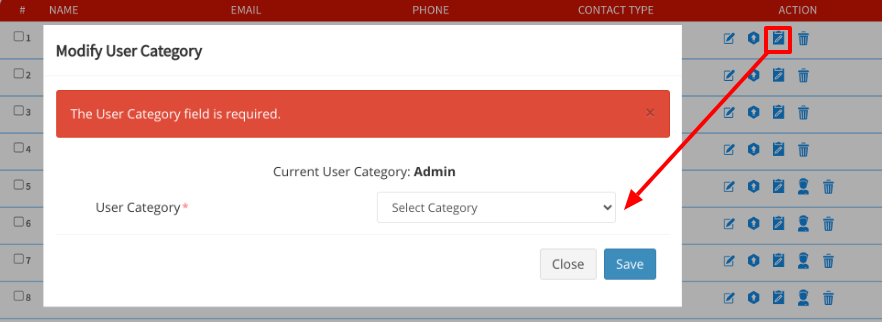
The next icon allows you to “Modify user category”.
Scroll to the bottom and click the email connector. You can choose from your default
email client, or use Gmail or Yahoo mail, instead 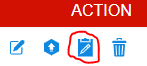 Perhaps you wish to allow a staff member to
access all records, or make updates to the database, by appointing them to the Admin
category. You can also use this command to assign users if your admin level permits.
Perhaps you wish to allow a staff member to
access all records, or make updates to the database, by appointing them to the Admin
category. You can also use this command to assign users if your admin level permits.
The final icon - the trashcan - 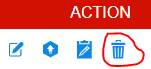 of course gives you a one-click means to delete
the record permanently. Be sure you wish to actually delete the contact record
before you click on the trashcan delete icon as it will be permanent!
of course gives you a one-click means to delete
the record permanently. Be sure you wish to actually delete the contact record
before you click on the trashcan delete icon as it will be permanent!
It is simple to send email messages from Contact Boss. You can select a list by <Contact Type>, or search for specific names or even by job title, city or other keywords. It will be very useful also to generate mailing lists by “Group” type, a designation that you would have created at the time of recording the contact i.e.if you created a “Group” for all the contacts who opted in to your mailing list, Contact Boss can quickly generate a list representing this group. This makes it easy to segment your database according to the message you wish to send. It is also possible to search by Group, using more than one selection i.e. all the names you have designated as "opt-ins,""construction" group, plus "registered for an event" or any combination you wish!
Once your list is created, scroll to the bottom and click the email connector. You can choose from your default email client, or use Gmail or Yahoo mail.
Contact Boss will automatically open the email in a pop-up window. All the names in the list will be copied over into the TO: line; you need not mark the check boxes in the list .You are ready to send directly to your contact!
If you are sending a bulk mailing you will likely prefer to send multiple emails using the BCC line in your email provider. Once the addresses are delivered to the TO line, simply press Control A on the TO line, then Control X, and finally press Control V on the BCC line, where your list of email addresses will appear, ready for sending.
If you opt not to use Gmail, Yahoo, or your default email service, you can create a CSV file for use with any of the email tools such as MailChimp, Outlook, Apple Mail or I-contact.
Sometimes you need a little nudge to remind you or a member of your team to look after tasks and follow up with customers. Contact Boss has a simple-to-use feature that will set up "auto-reminders" that can be delivered on specific dates to any member of your team
To begin, click <Create Reminders> on the left-hand menu. Then you can assign the task to someone in your contact list, and identify the person to follow up with (both from dropdown lists).
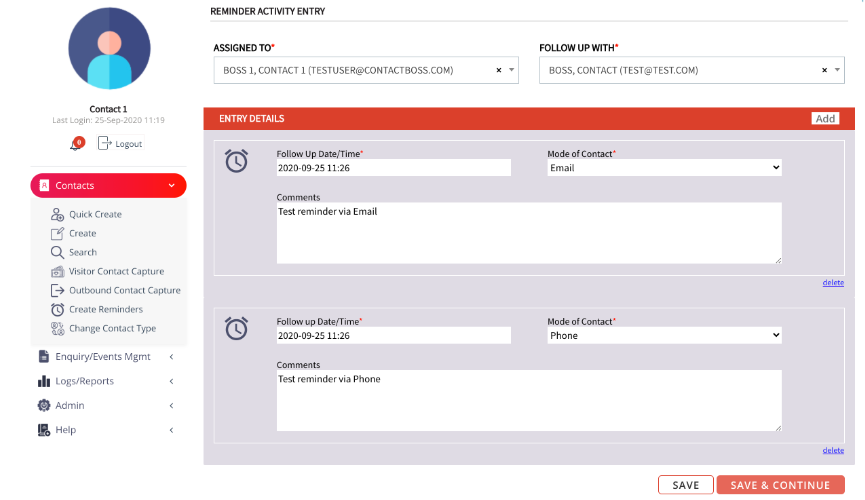
Finally, in the Entry Details section select the <Follow-up date and time> and the <Mode of contact> (choose from phone, email virtual meeting, in-person or other). Enter any comments and Save! This will now list as a notification and be delivered to the assigned staff person accordingly.
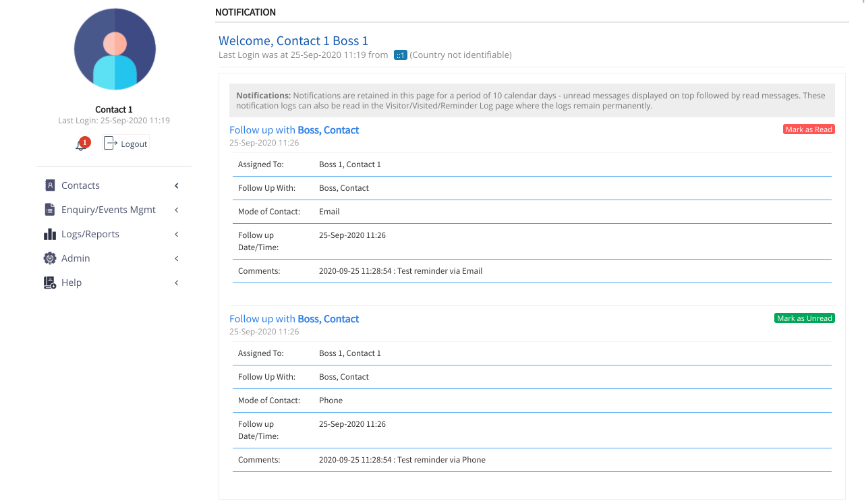
You can also use the log to track any reminders that have been scheduled. Simply open the Logs/Reports menu item and choose Reminder Log from the drop-down menu. You will see a running record of the Reminders, complete with date, the person who was assigned the task, the contact to follow up with, the mode of contact and the status. You can edit the reminder, or delete it if you wish. You will notice that, to refresh your memory, you can also click on the contact to pull up profile details.

When you create a contact, you will be asked to select a <Type of Contact> from a drop-down menu; these types are pre-determined and include options such as client or employee. However you may find it very useful to define your own groups. Perhaps a Group could include the names of all those who opted in to your mailing list, or all those who attended an event, or requested further information.
Under the <Admin> heading
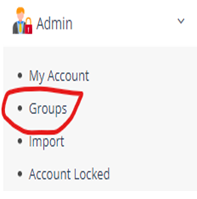
you will find the option to create <Groups> . Select the <Groups> heading and click on the <ADD> button which gives you an opportunity to name your <Group>. Then the <Status>can be defined as Active or Inactive. You can also re-name the list with the <Edit> pencil icon or delete the group. Using defined Groups that you have defined can make the Search process even more efficient.
You can choose the <Group> at the time you are creating the contact, or you can return and edit the contact to assign it to a <Group>.
Contact Validation is a feature within Contact Boss designed to ensure the accuracy and reliability of the contact information. This feature improves overall communication efficiency.
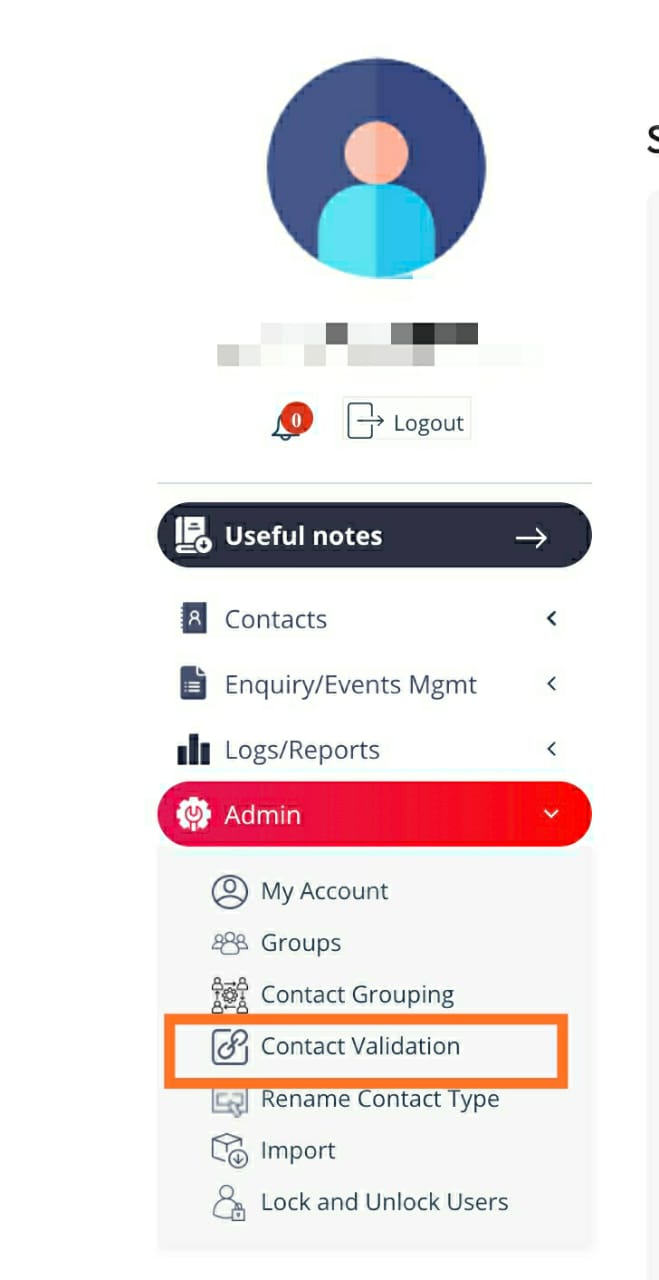
To start the contact validation process, select the “Contact Validation” option from the vertical menu panel on the left side of the window.
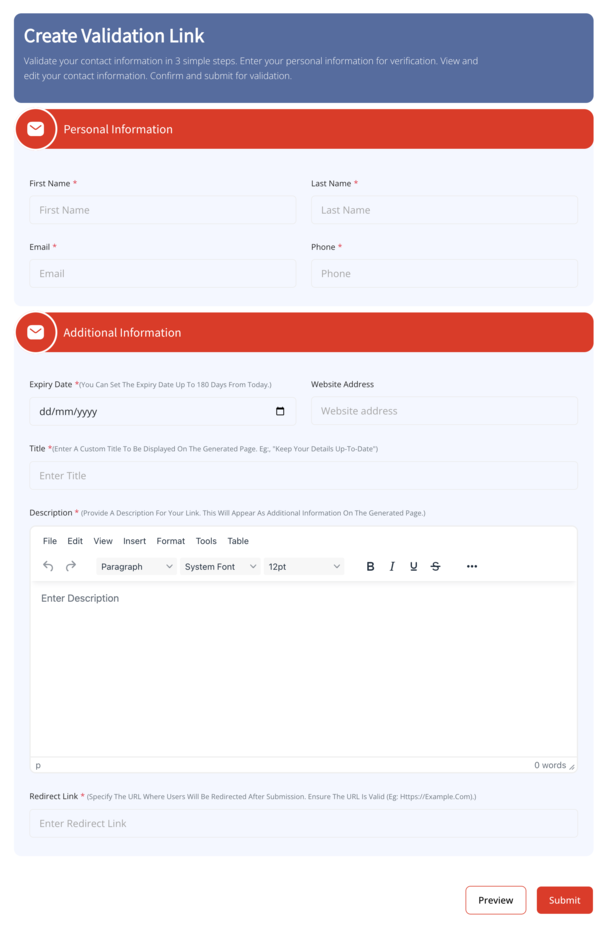
The validation process begins when a ‘Contact Validation’ link is created. Only an admin user with pro/premium login access to the software can create a Contact Validation link. To create the link, the pro/premium user needs to enter the first name, last name, email and mobile phone number of the contact person for contact validation help and support.
In the same form, there is provision to enter additional information including link expiry date, website address, title, description and redirect link.
Additional Details:
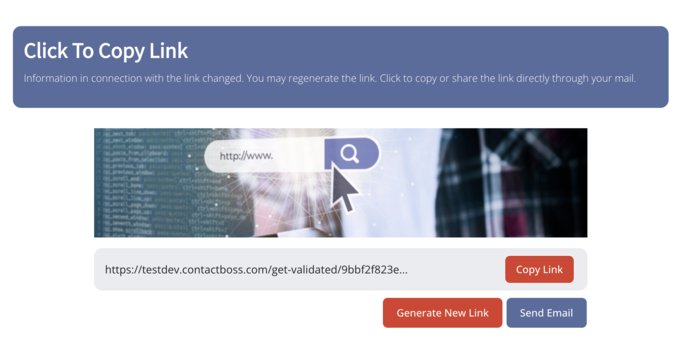
When the user clicks the submit button after entering the information, the user will be taken to a new page where a new ‘Contact Validation’ link is generated. In the link page there are options:
This link may be shared to all the contacts where they can verify and update the contact information by clicking the link.
Using the link for contact validation, the contacts can access their contact information by entering some of the basic information including email address, mobile phone number and postal code in either of the following combinations.
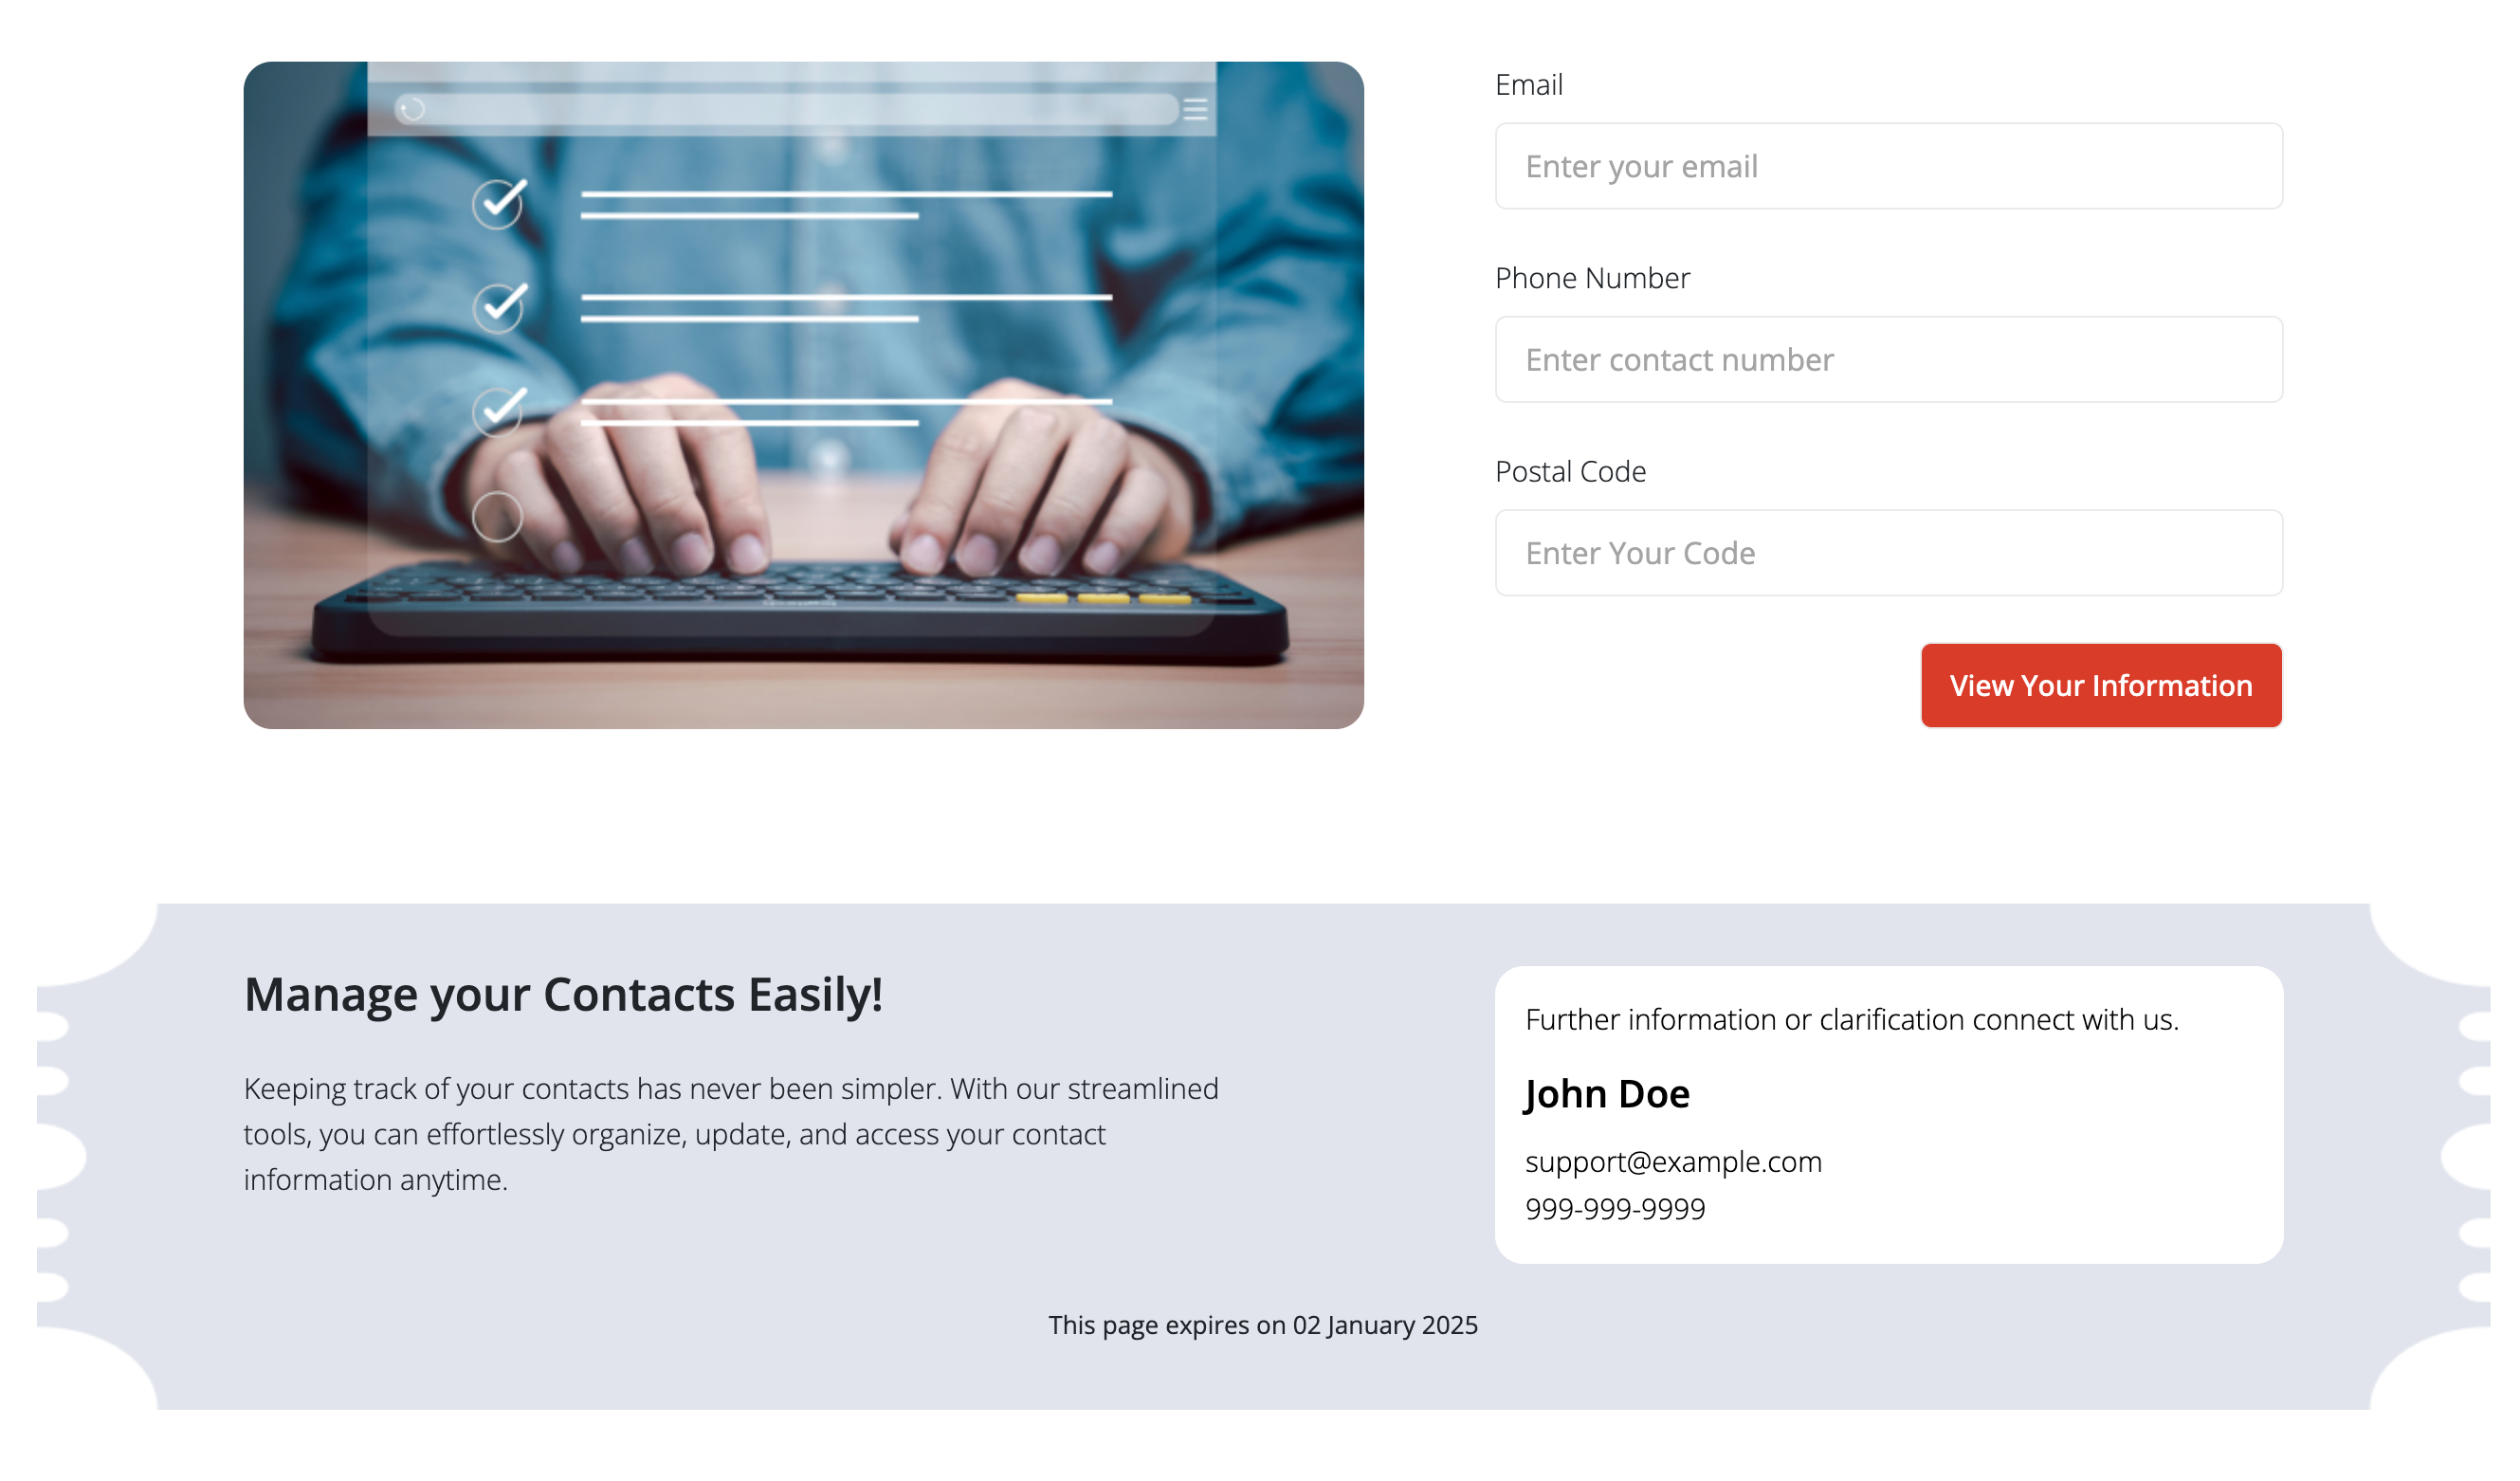
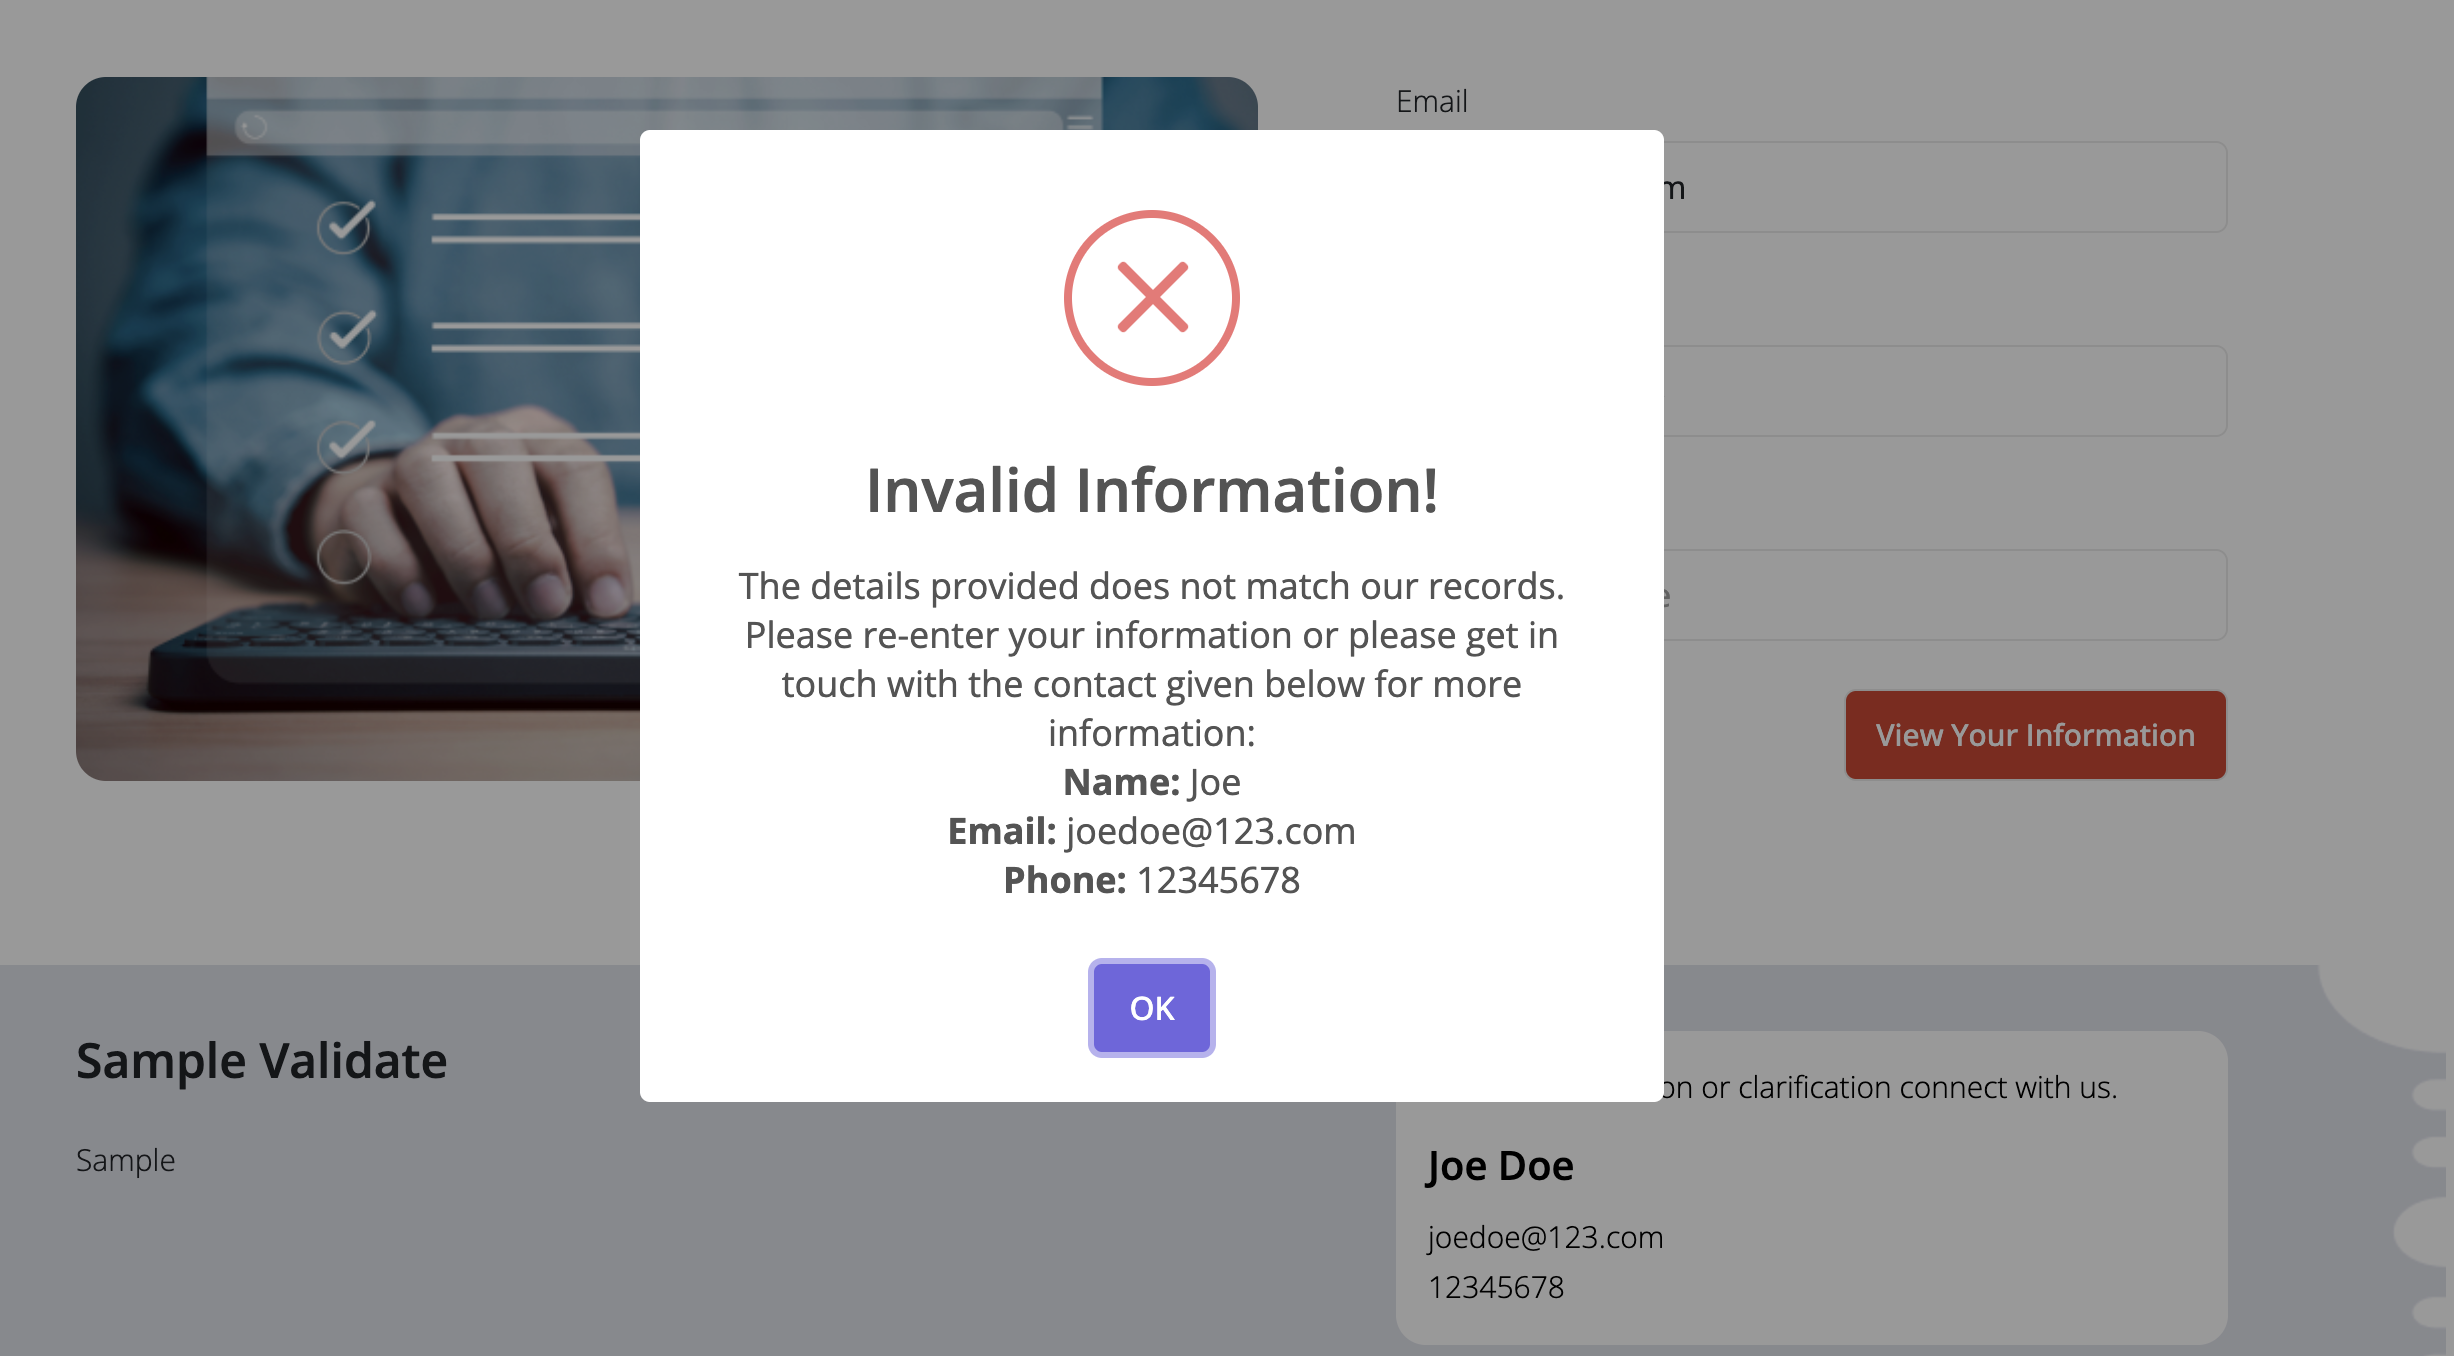
If there is any mismatch in the information provided including email address, mobile phone number or postal code, an error message will be displayed. Either you can re-enter your information or get in touch with the contact person using the information given at the bottom right position of the page.
Once you get access to your contact information, you can verify whether your contact information is correct and updated. According to the requirement, you may update contact information including
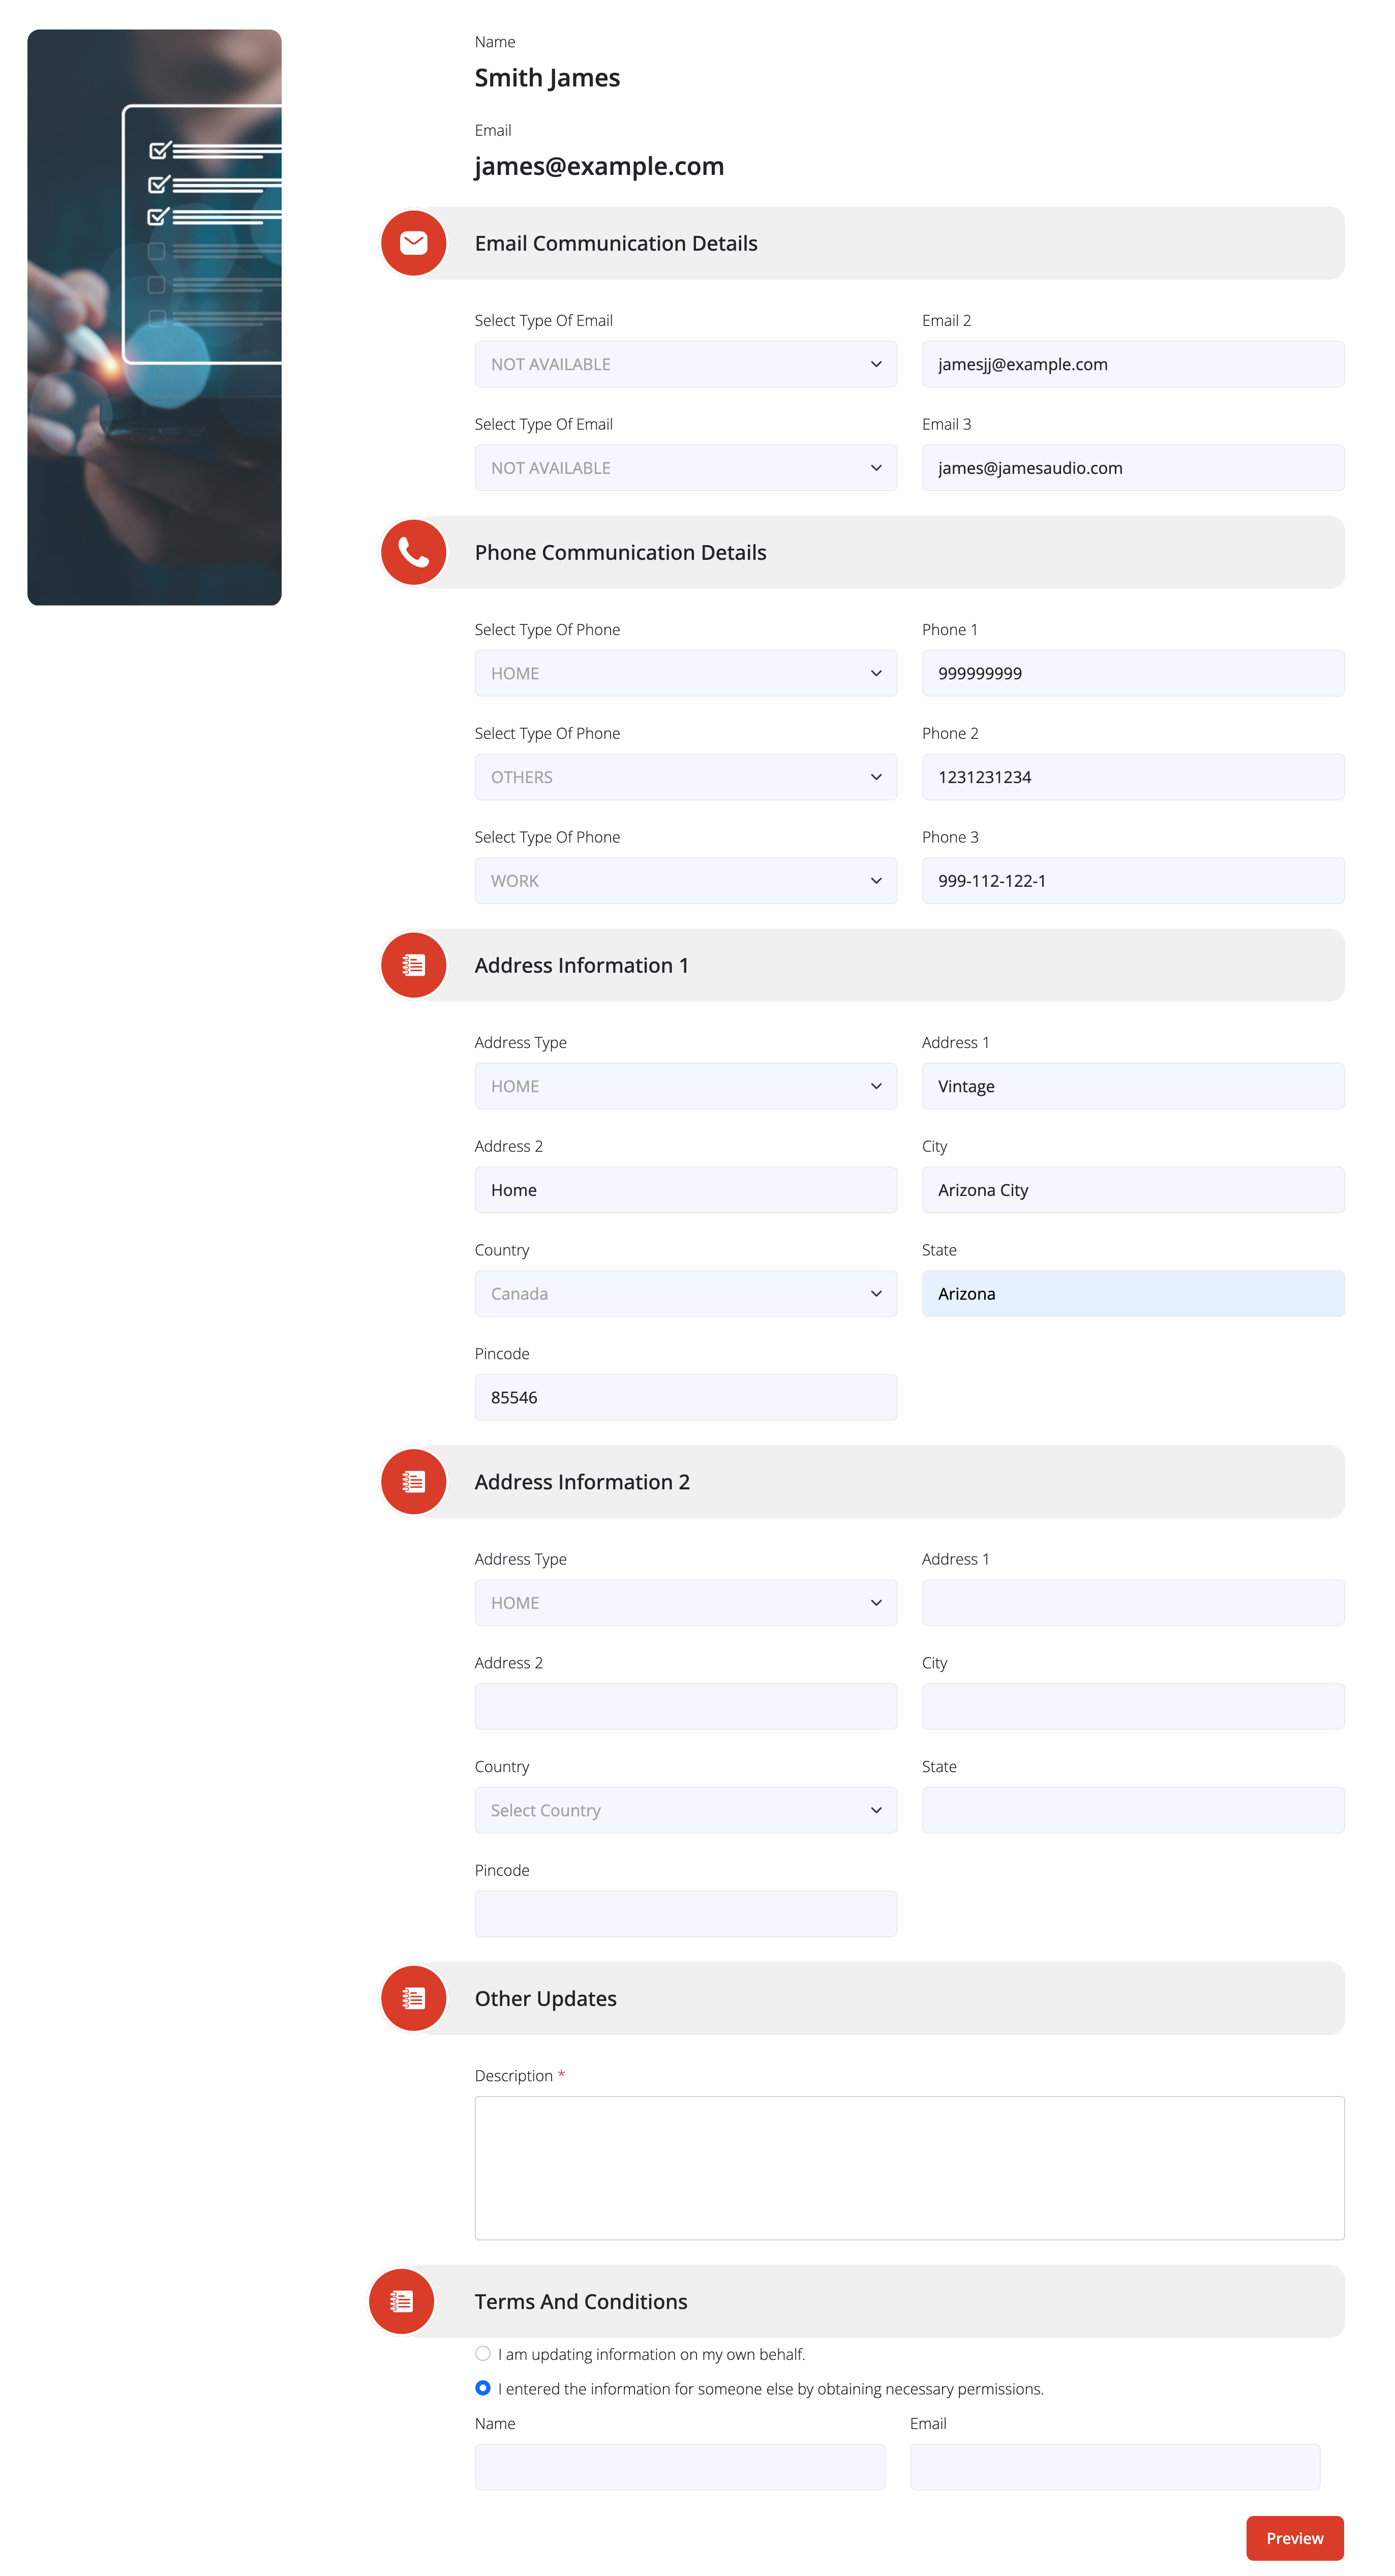
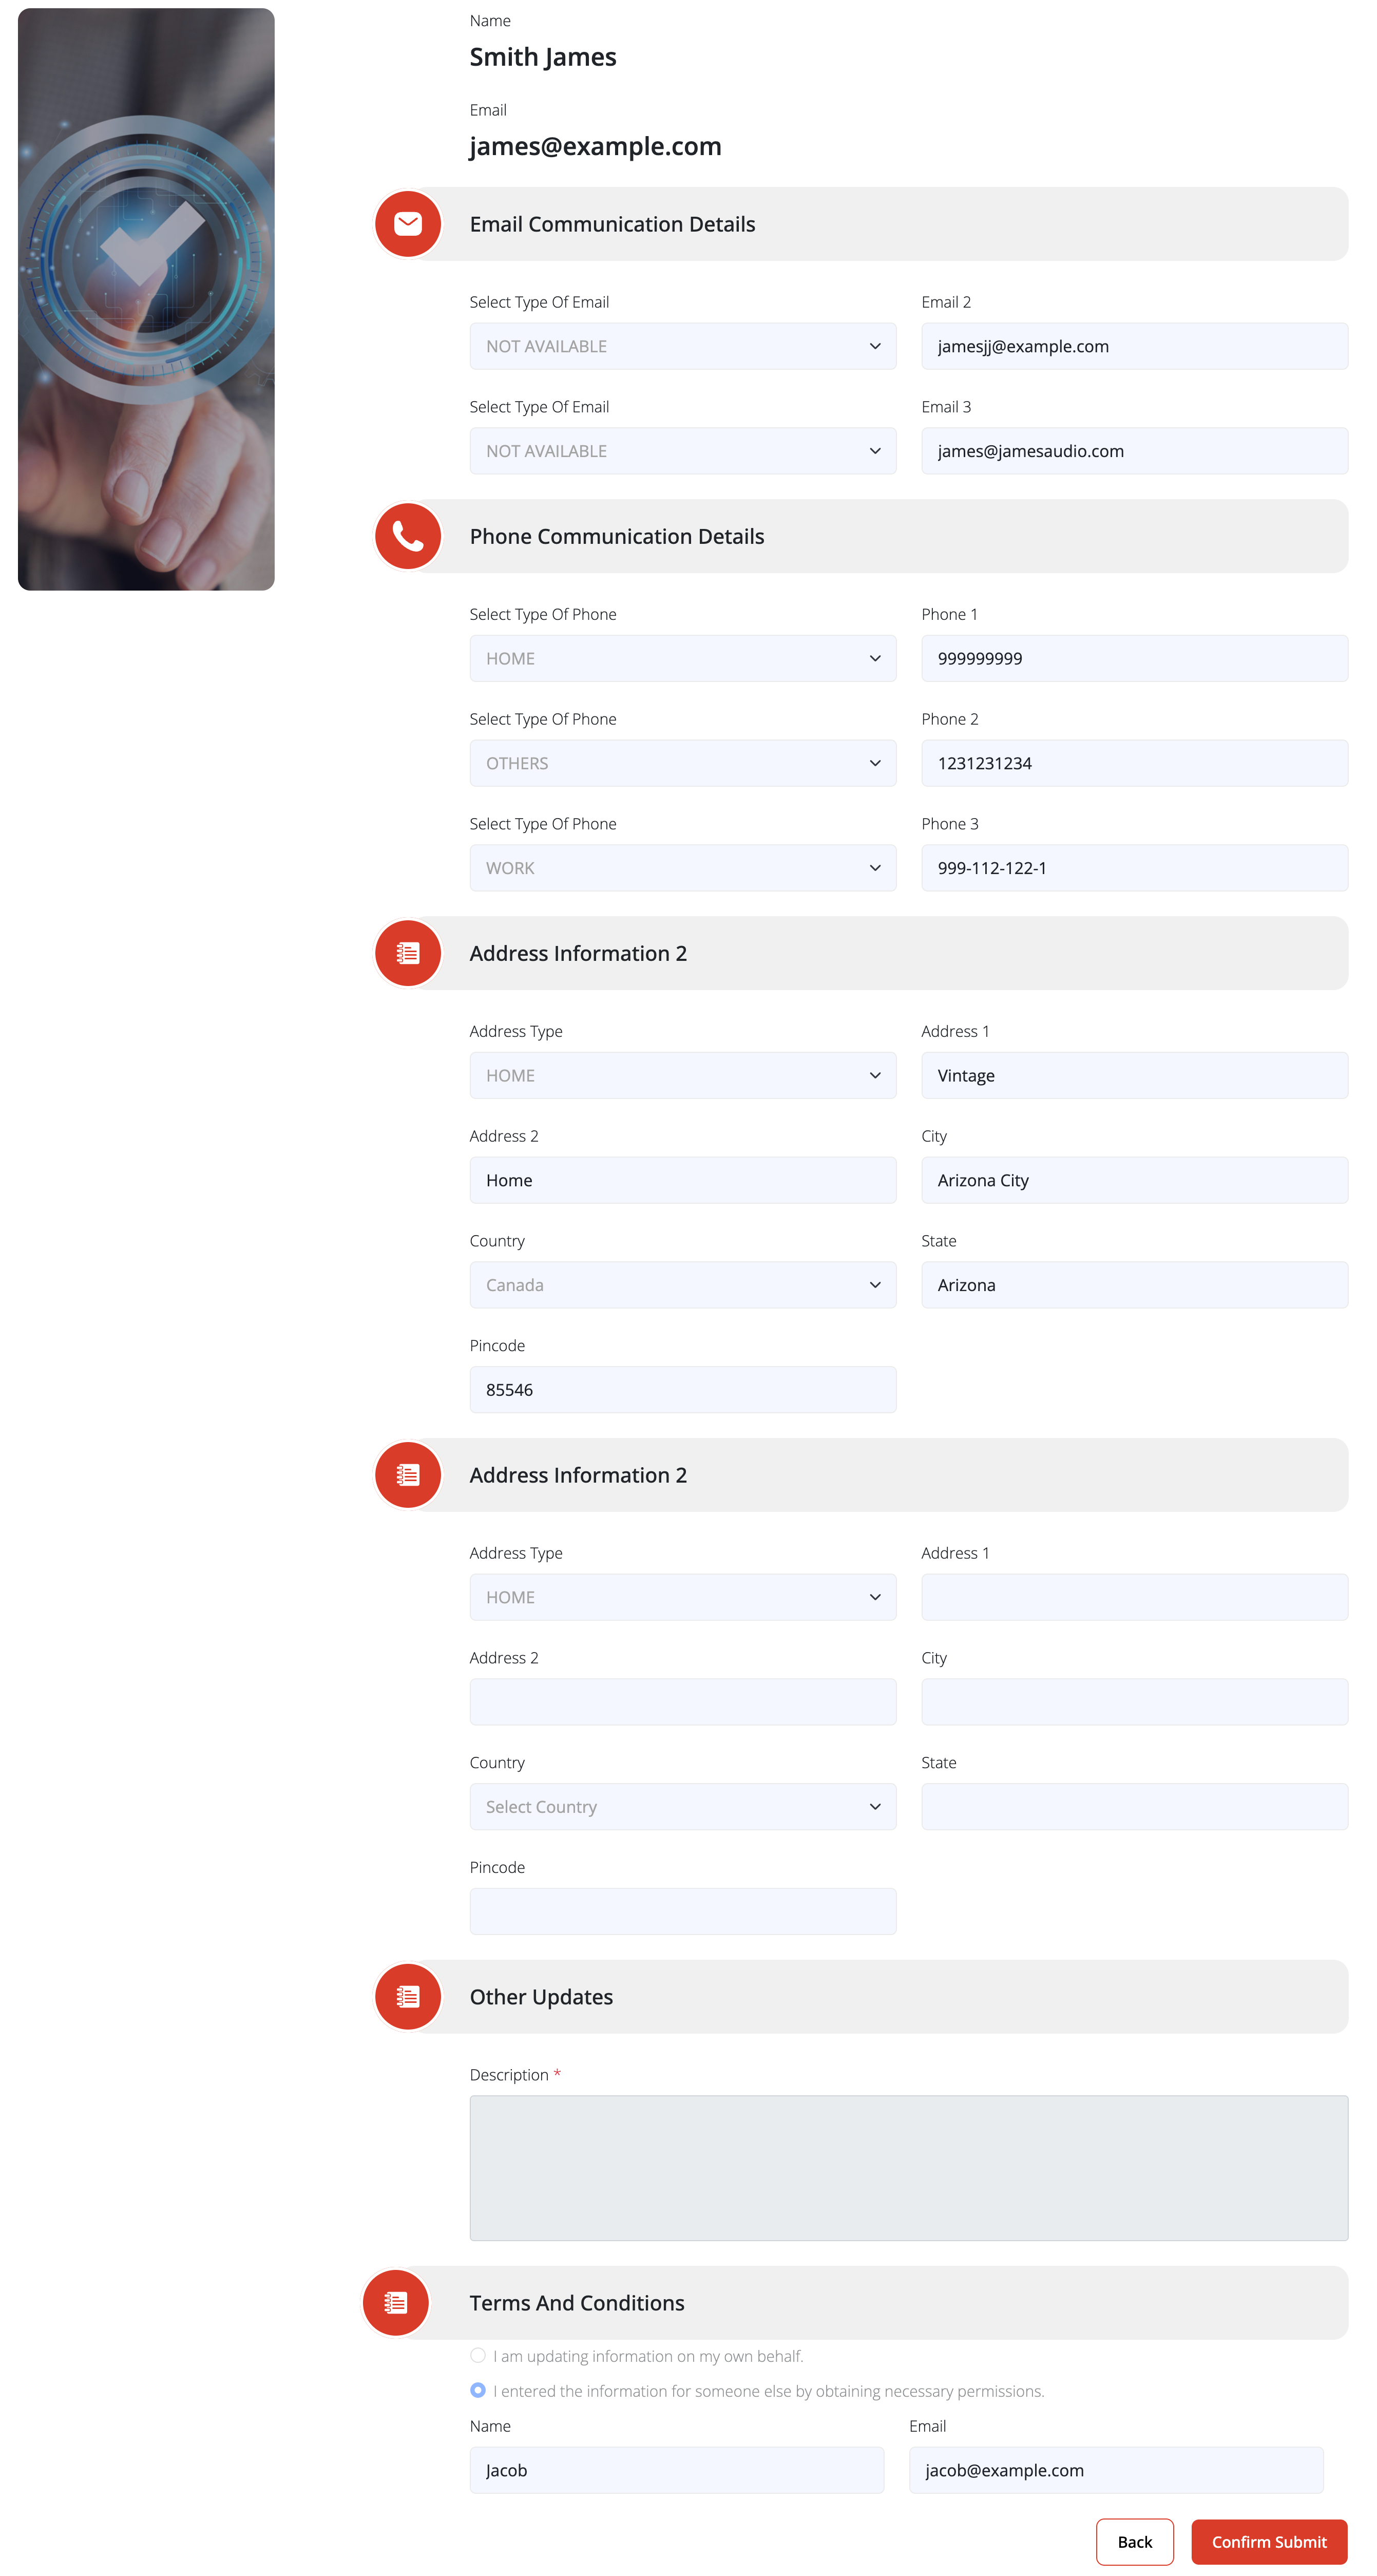
Once you finish entering the contact information, you need to check the box of declaration statements. You can also verify and update contact information of others. If you are entering the information for someone else, you need to check another box to declare the same. If you check the box, you also need to enter your name and email address. You can preview the information you entered using the preview button at the bottom of the form. The preview can be used to confirm the updates in the contact information are right. After confirmation, the contact information can be sent to the database by pressing the submit button. The updates made in the contact information will be reflected in the database as soon as the form is submitted. Once the form is submitted, the contact will be redirected to the site as per the link given by the user in the redirect link section of the ‘generate link’ page.
Contact grouping helps you organize your contacts efficiently. By reducing the time for adding, categorizing, and segmenting your contacts into groups, this feature makes it easier to find and communicate with them. The contact groupin group management feature is for groups and contacts already added to the database. For adding new contacts or groups, you have to use the respective features.
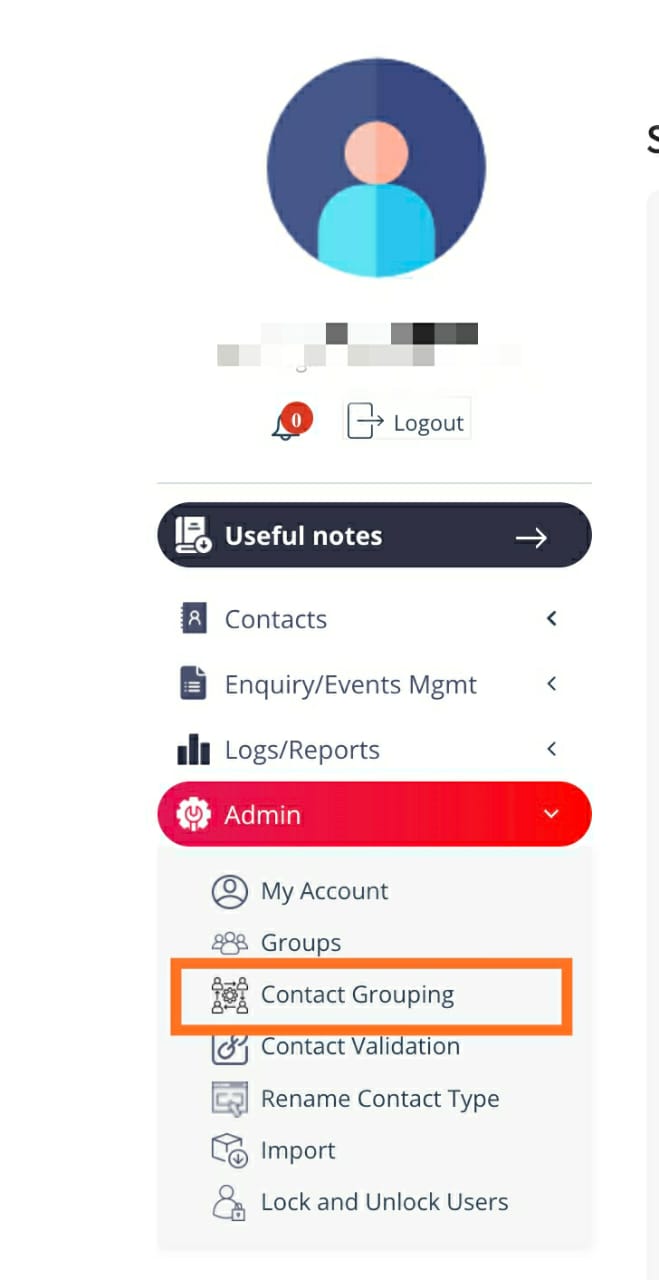
To start the contact grouping process, select the “Contacts Grouping” option from the vertical menu panel on the left side of the window.
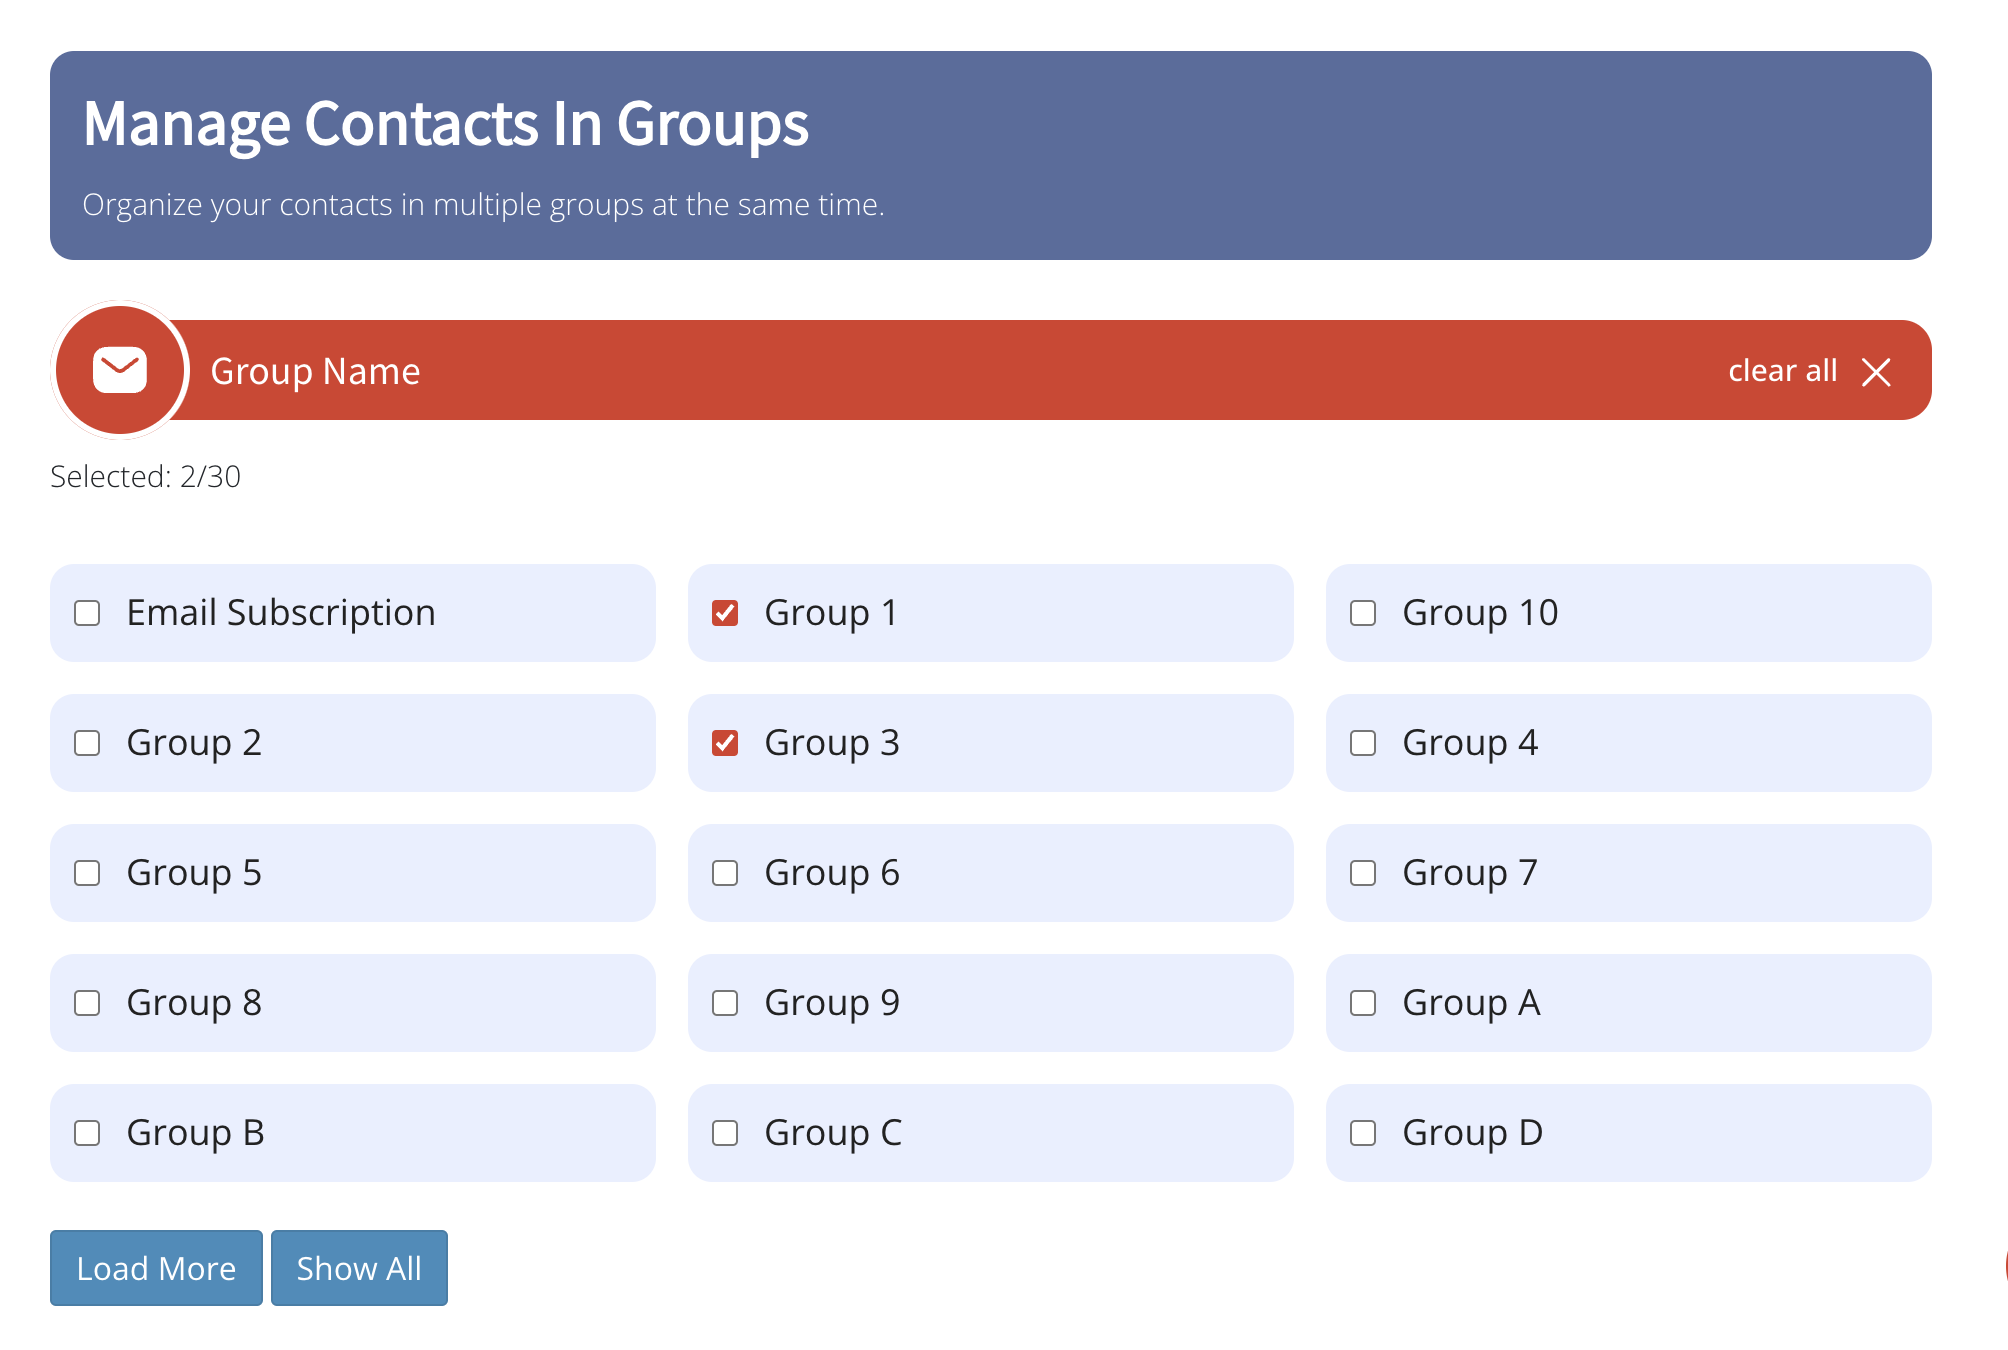
In the contact grouping window, you can select the groups in the first section. The groups you have already created will be available here. The list of groups is arranged in 3 columns and 5 rows, displaying only 15 group names at a time. The next 15 group names can be viewed using the “Load More” button. To view all the group names, use the “Show All” button. You can select multiple groups at a time, up to 30 groups. The number of selected groups will be displayed live. In case of wrong selections of groups, you can unselect the wrong ones or use the clear all reset button to clear all the groups selections. Once you have selected the groups, you can select the contacts to be added to the groups.
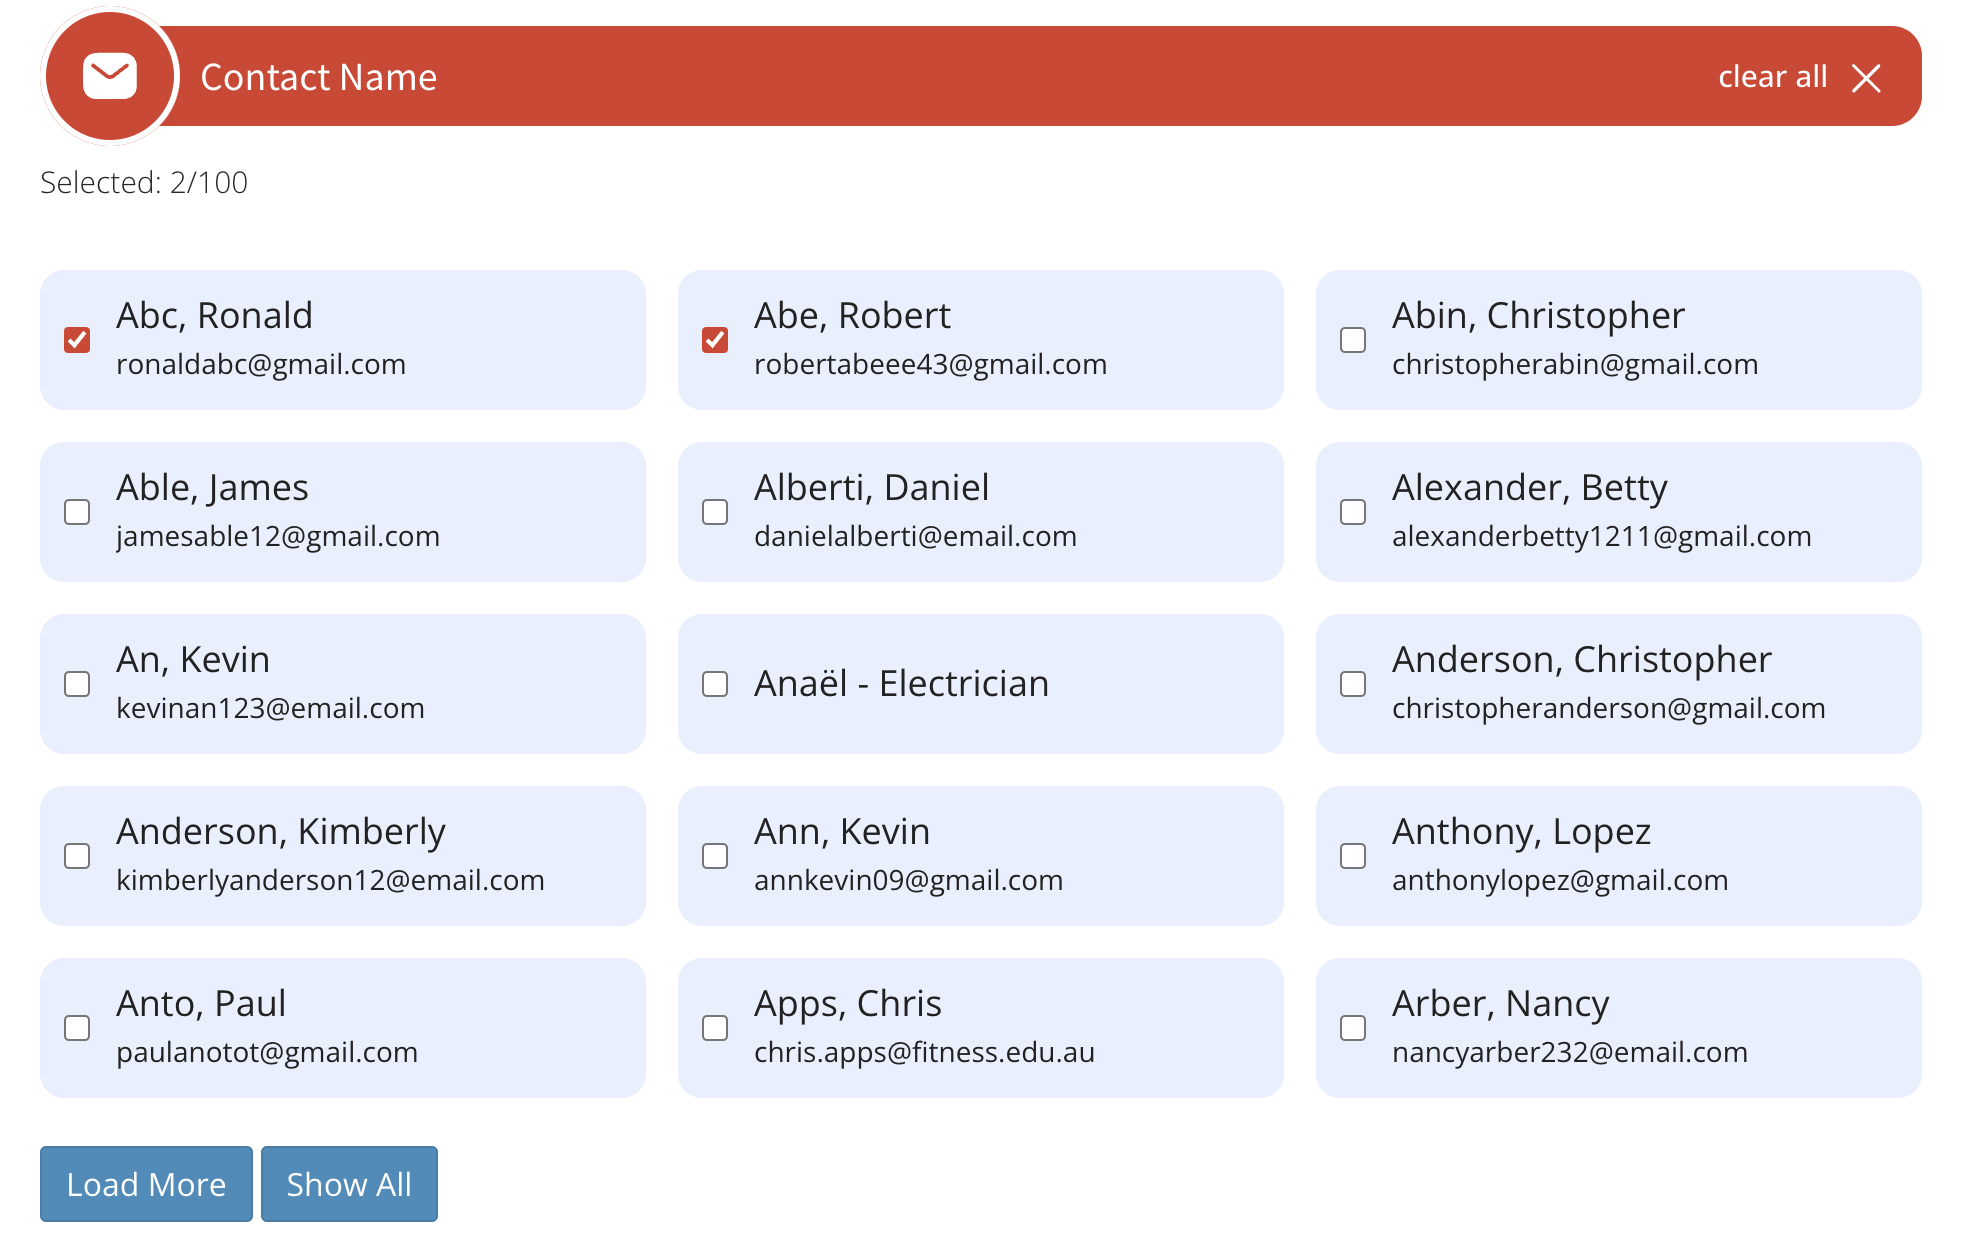
You can select the contacts from the second section. Here also, 15 contacts are displayed at a time. You can use the “Load More” and “Show All” buttons to view more contacts. You can also select multiple contacts, up to 100, as common contacts to the selected groups. The number of selected contacts also will be displayed live.
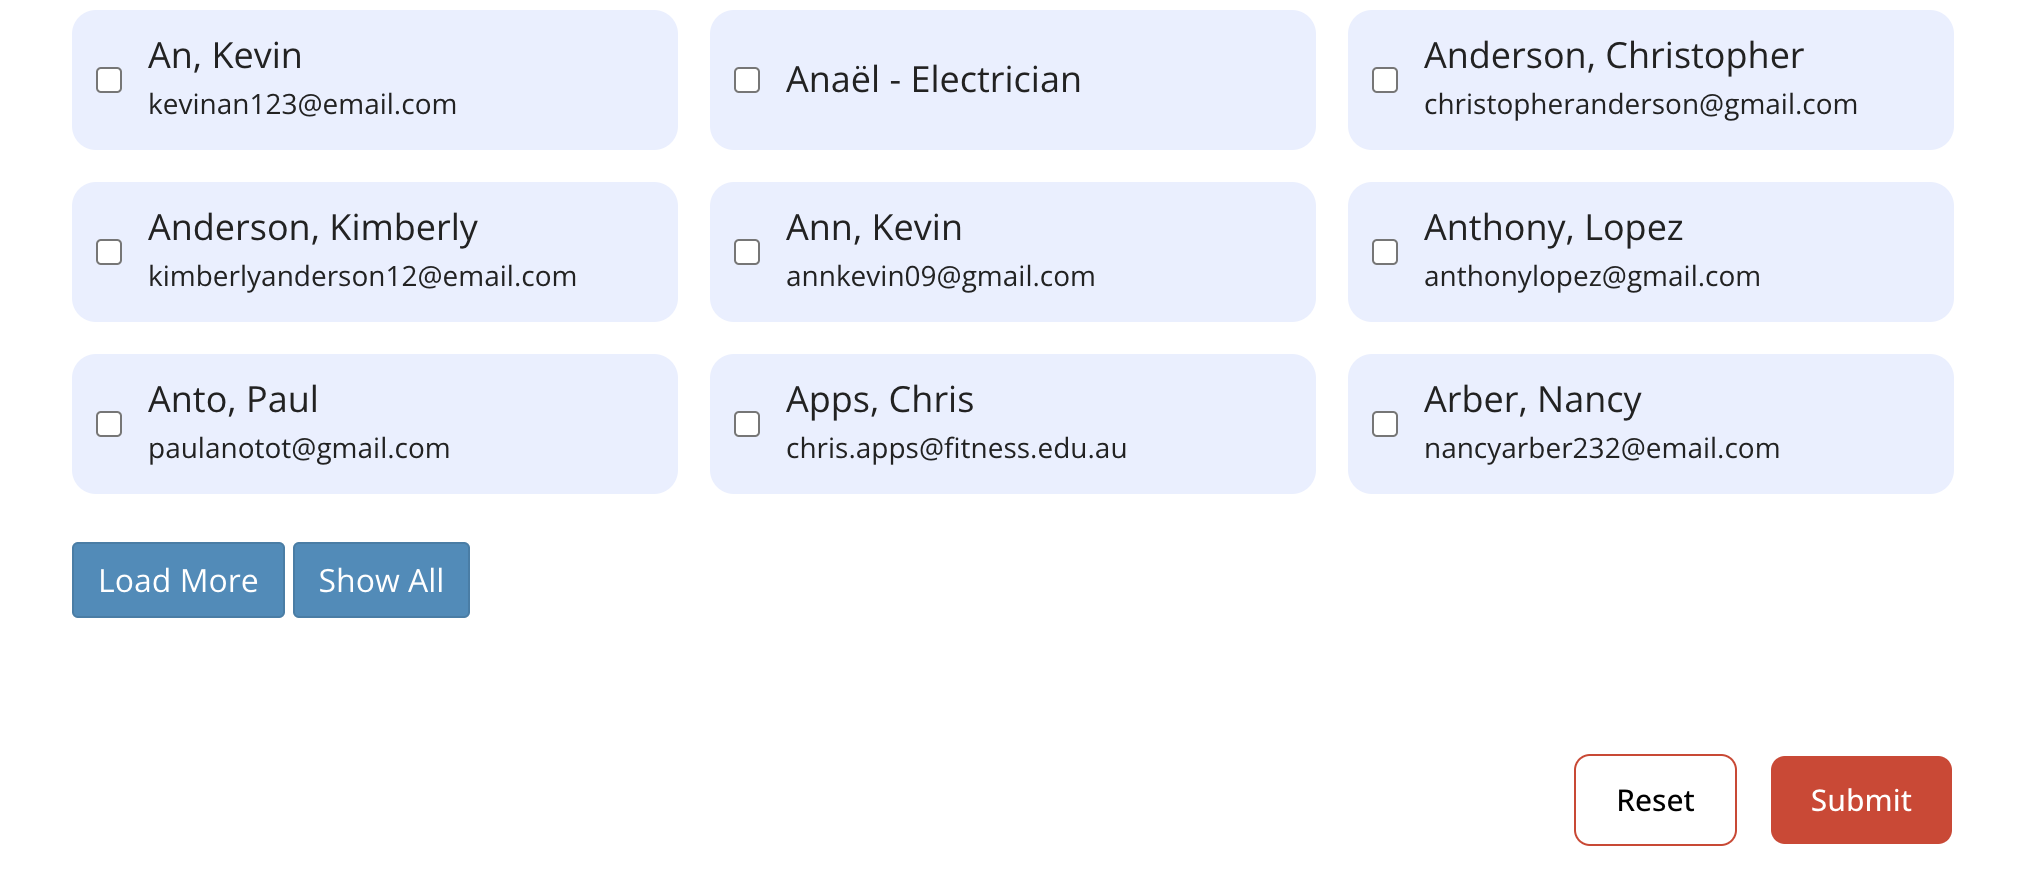
In case of wrong selections of contacts as well, you can unselect the wrong ones or use the clear all button to clear all the contacts selections. Also you can clear all selections in the group section and contact section using the Reset button.
Once you have selected the contacts, you can press the submit button to finalize the addition of contacts to the groups.
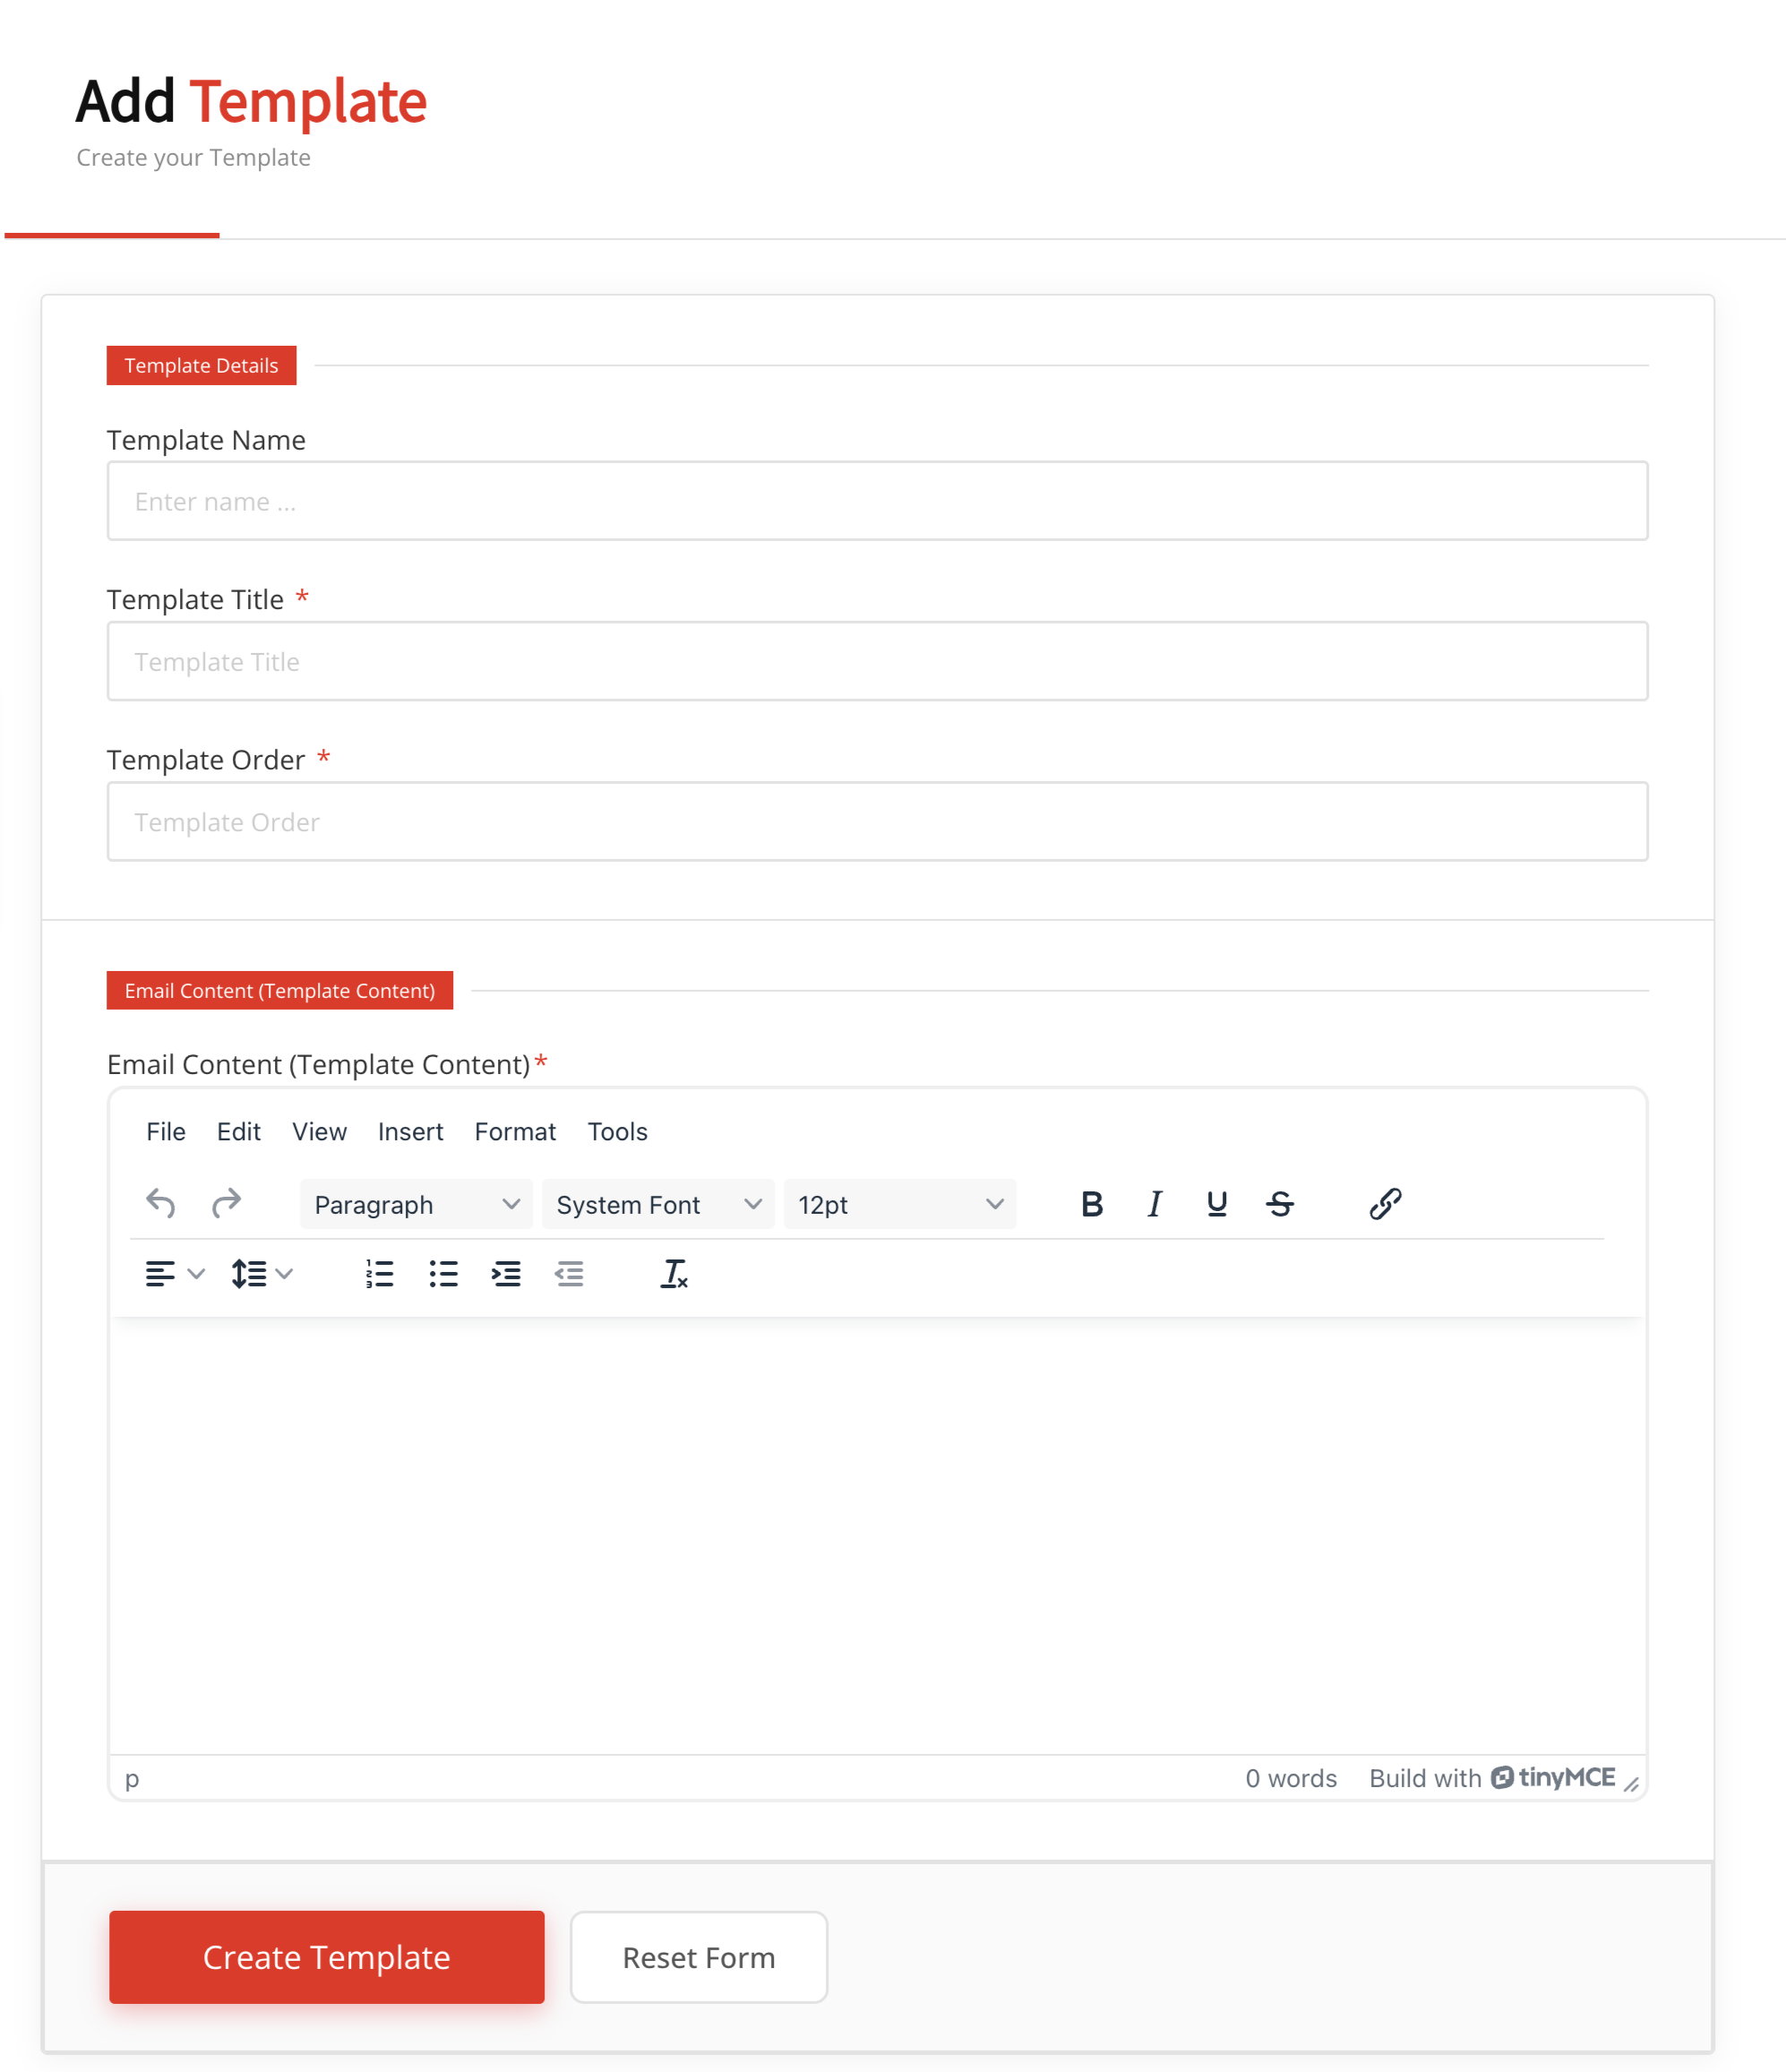
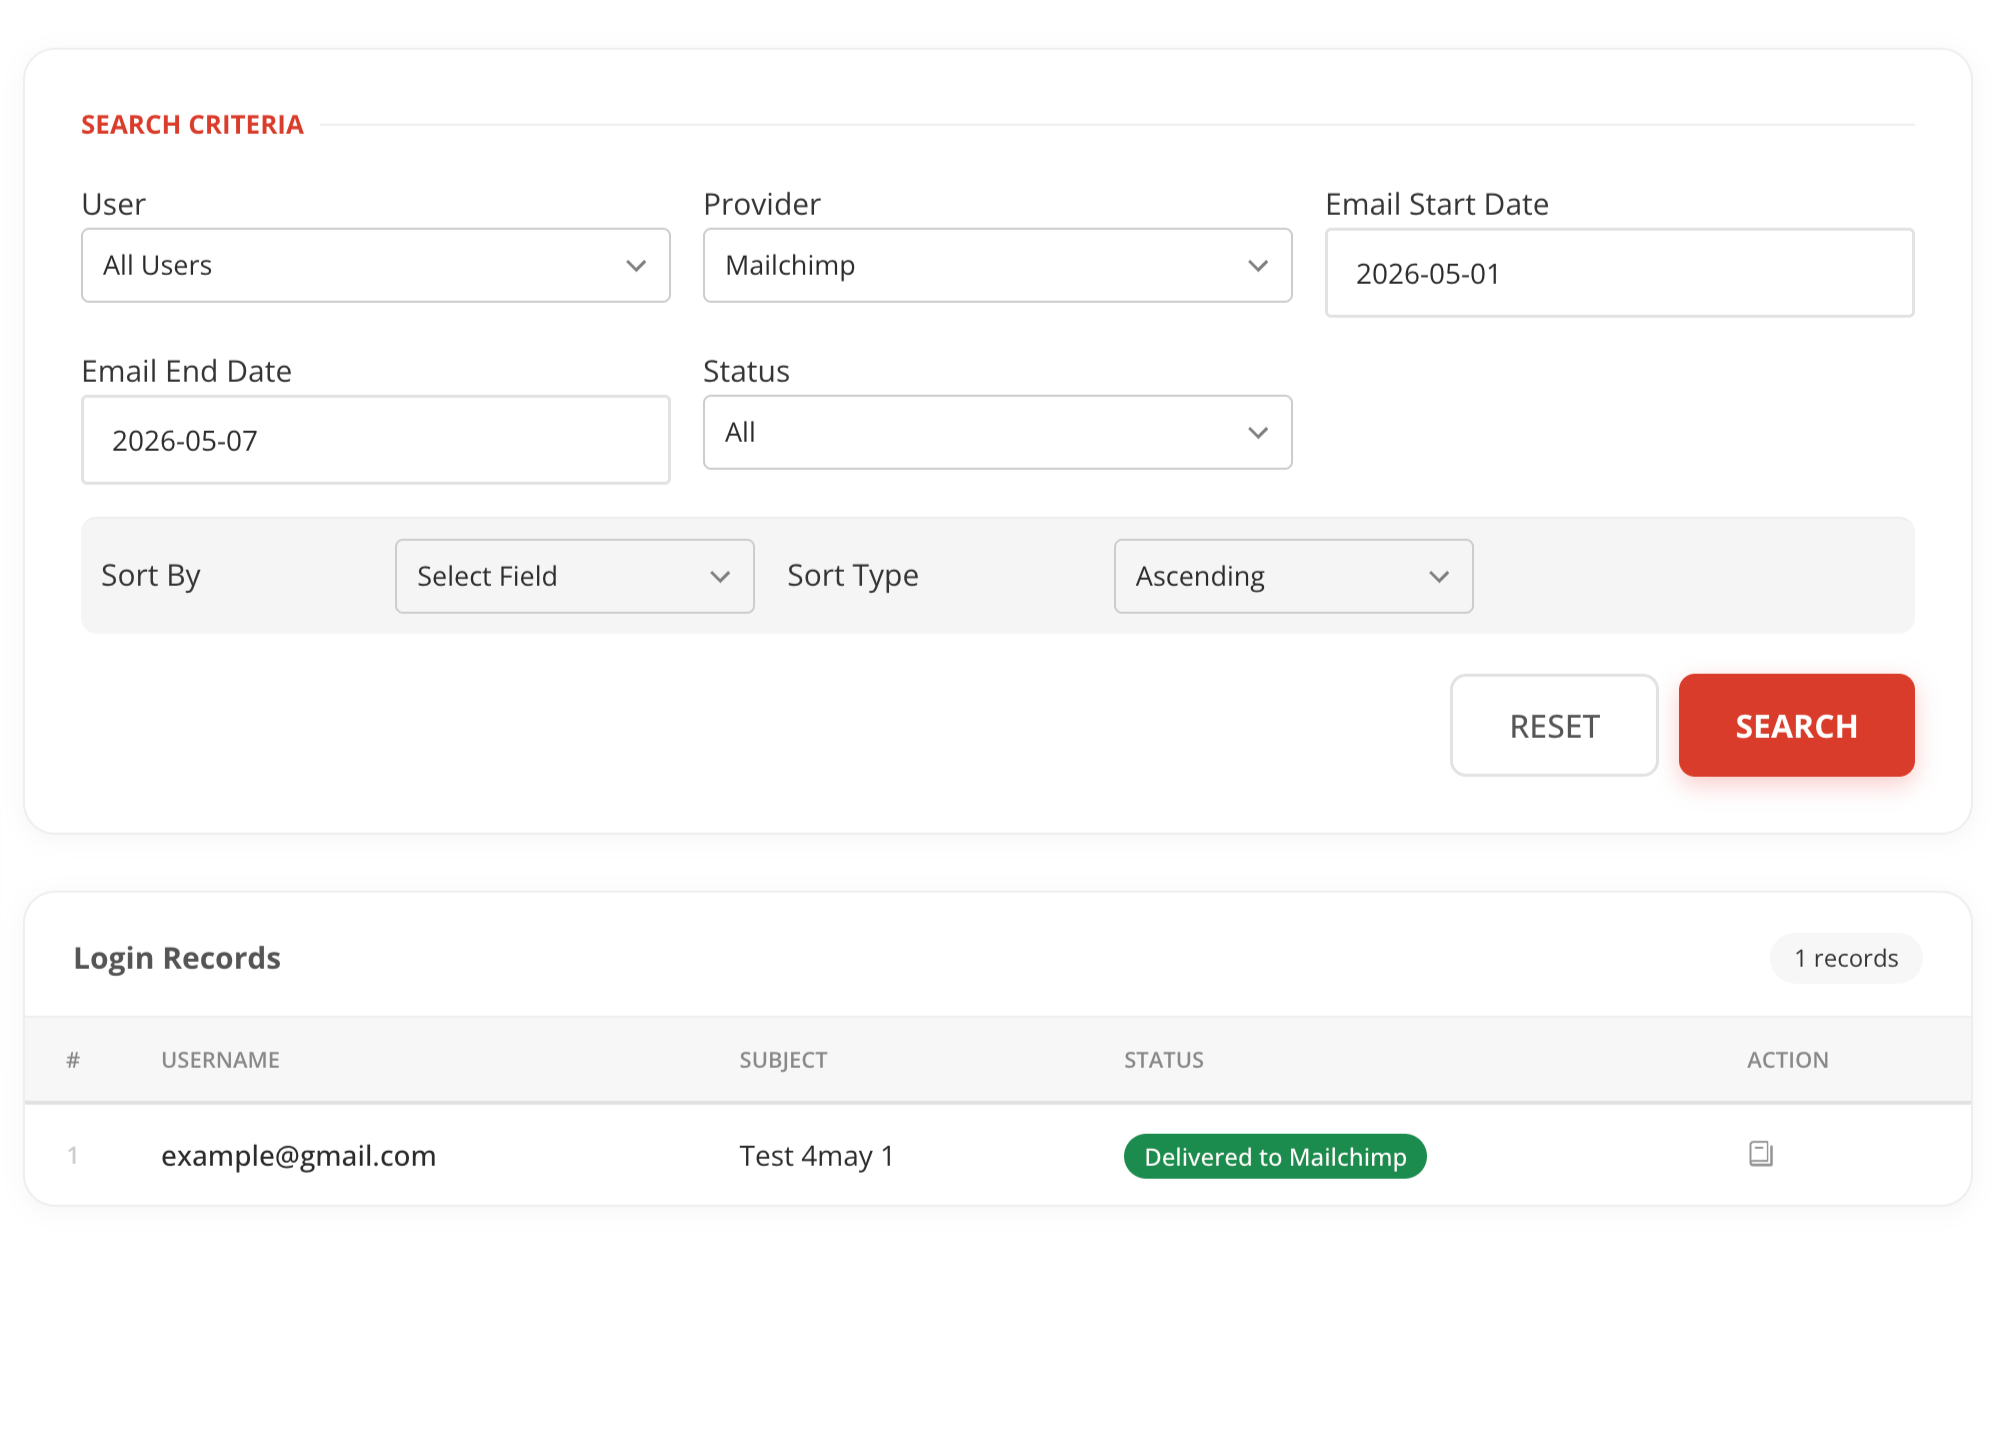
This feature enables users to send email campaigns through Mailchimp or Mailjet directly from the platform.
Before using email integrations:

After completing configuration:
Within Email Integrations:
To send emails to a group:
Select a contact list from the search grid
Choose contacts with valid email addresses
Use the available option to transfer selected emails into the email composition interface
Important Notes:

For successful email delivery:
Emails can also be directly typed into the Email Integrations - Send Email
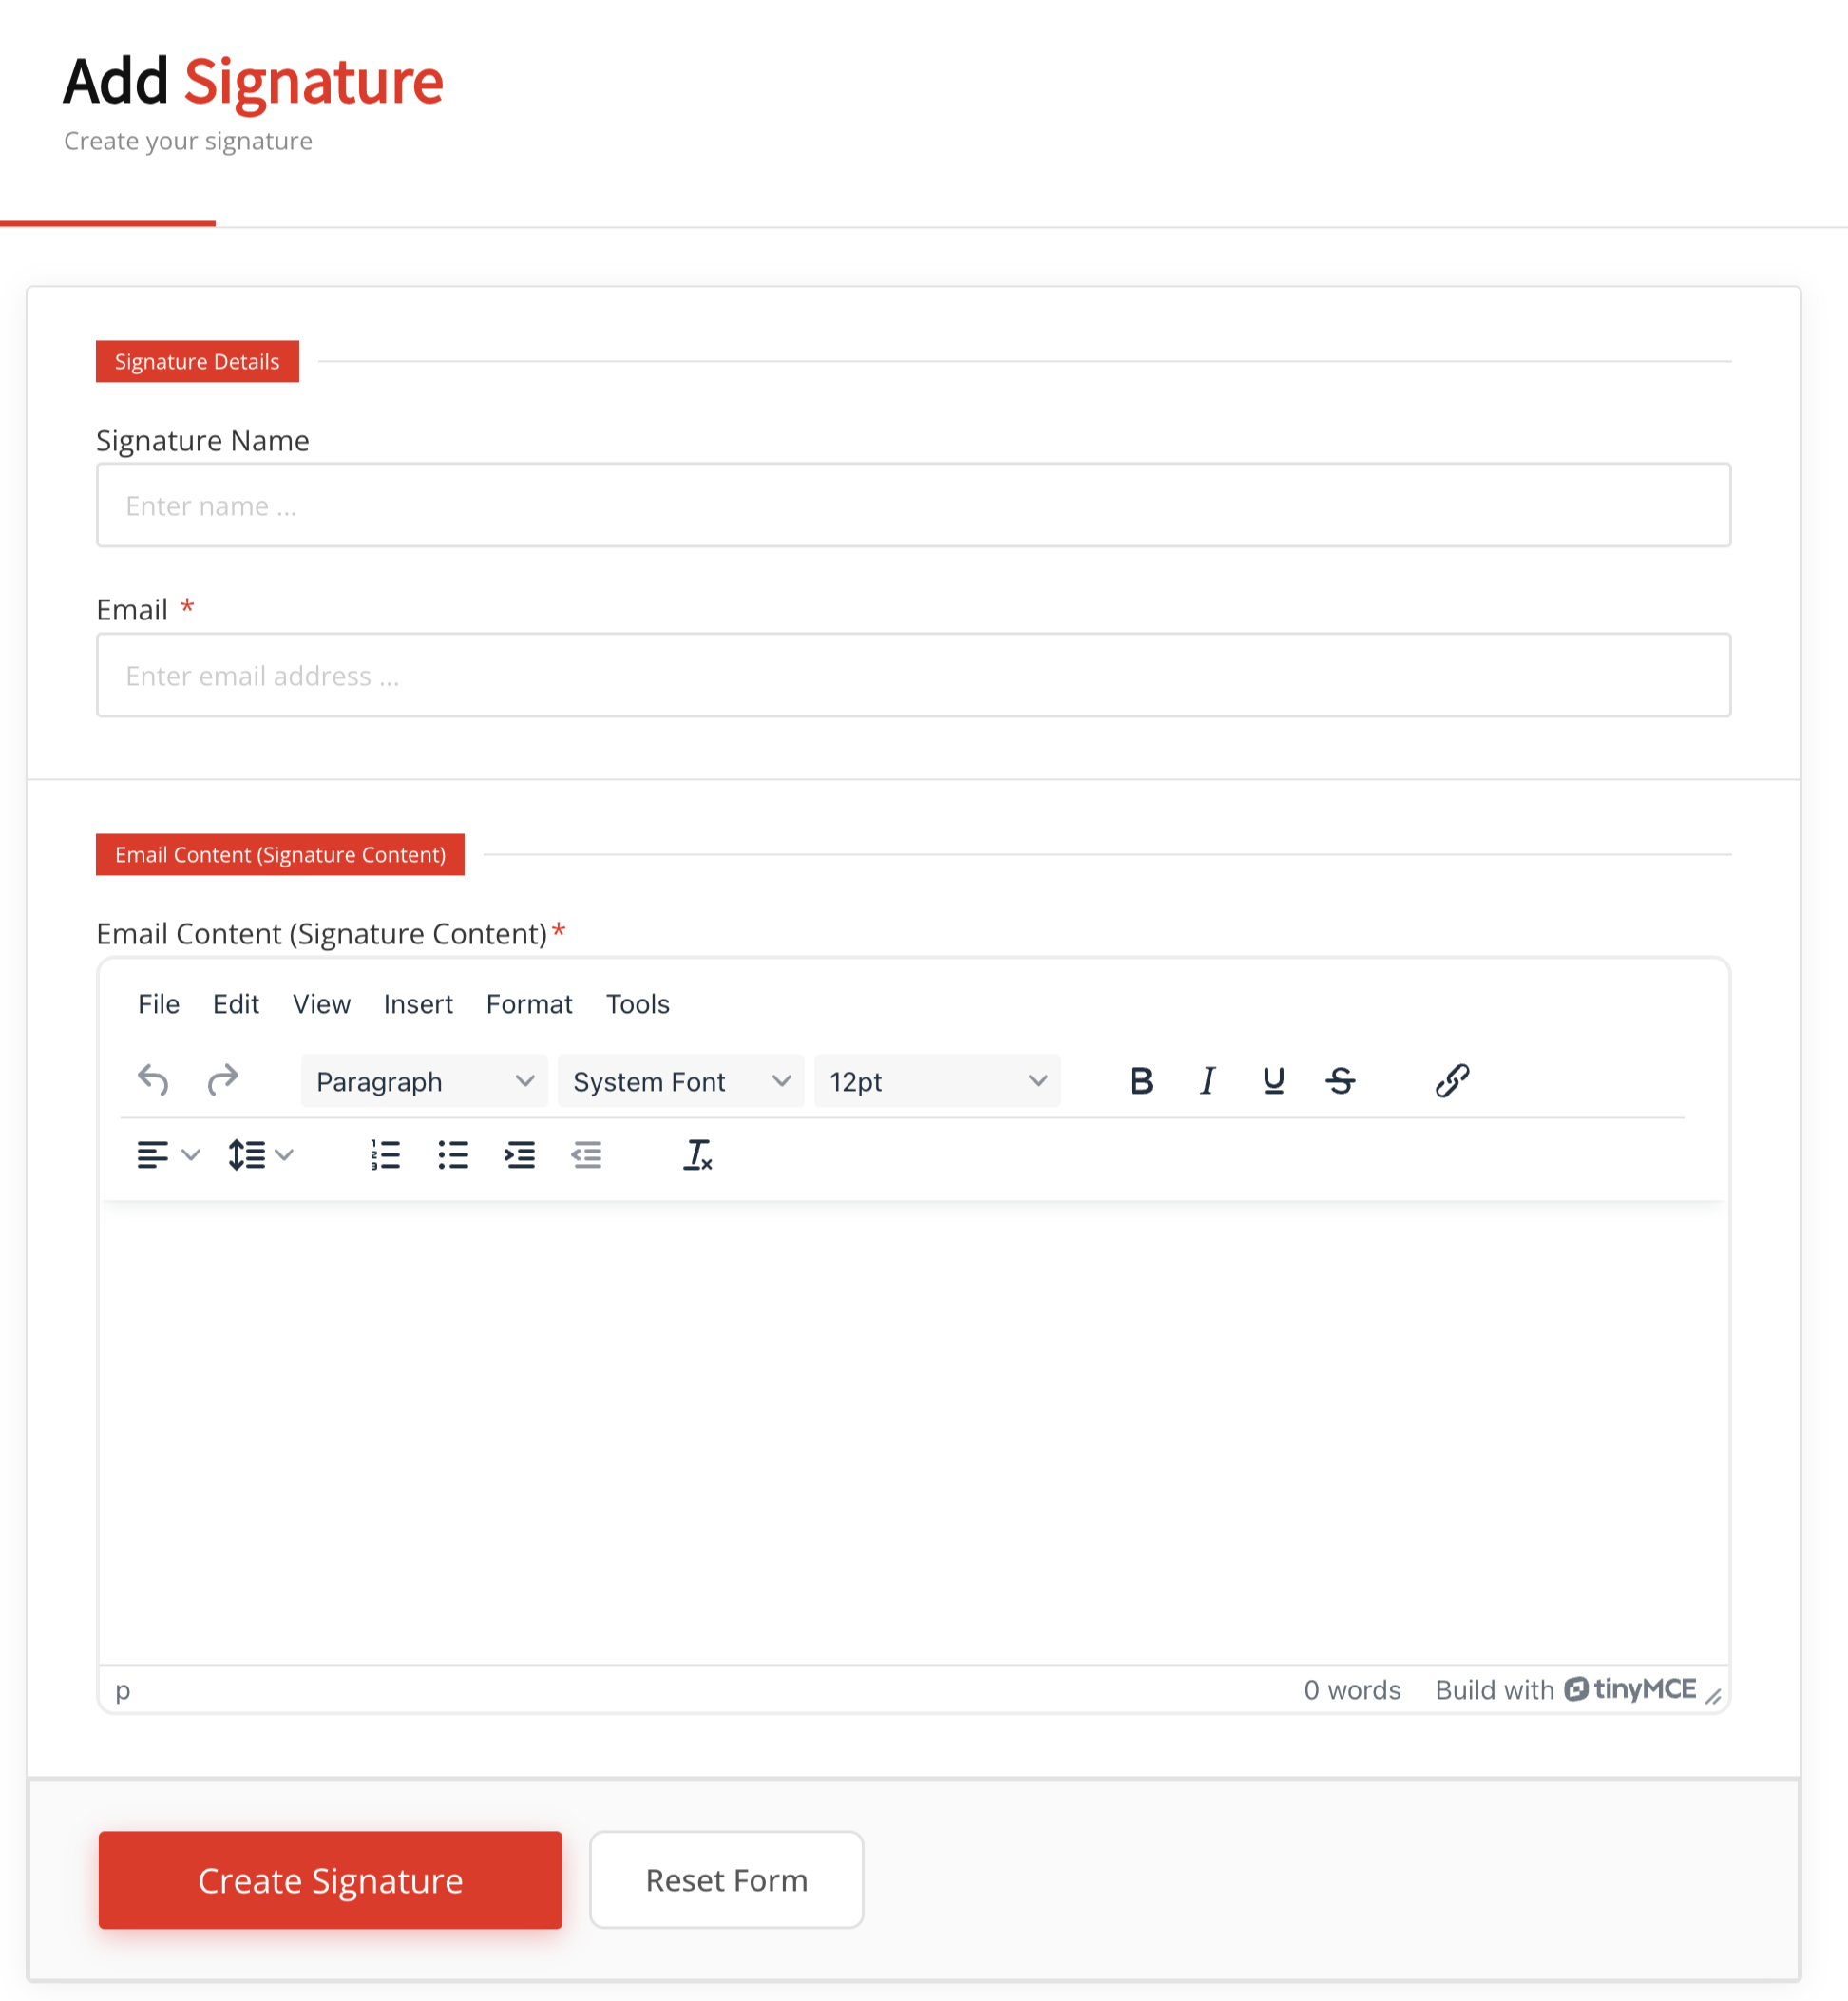
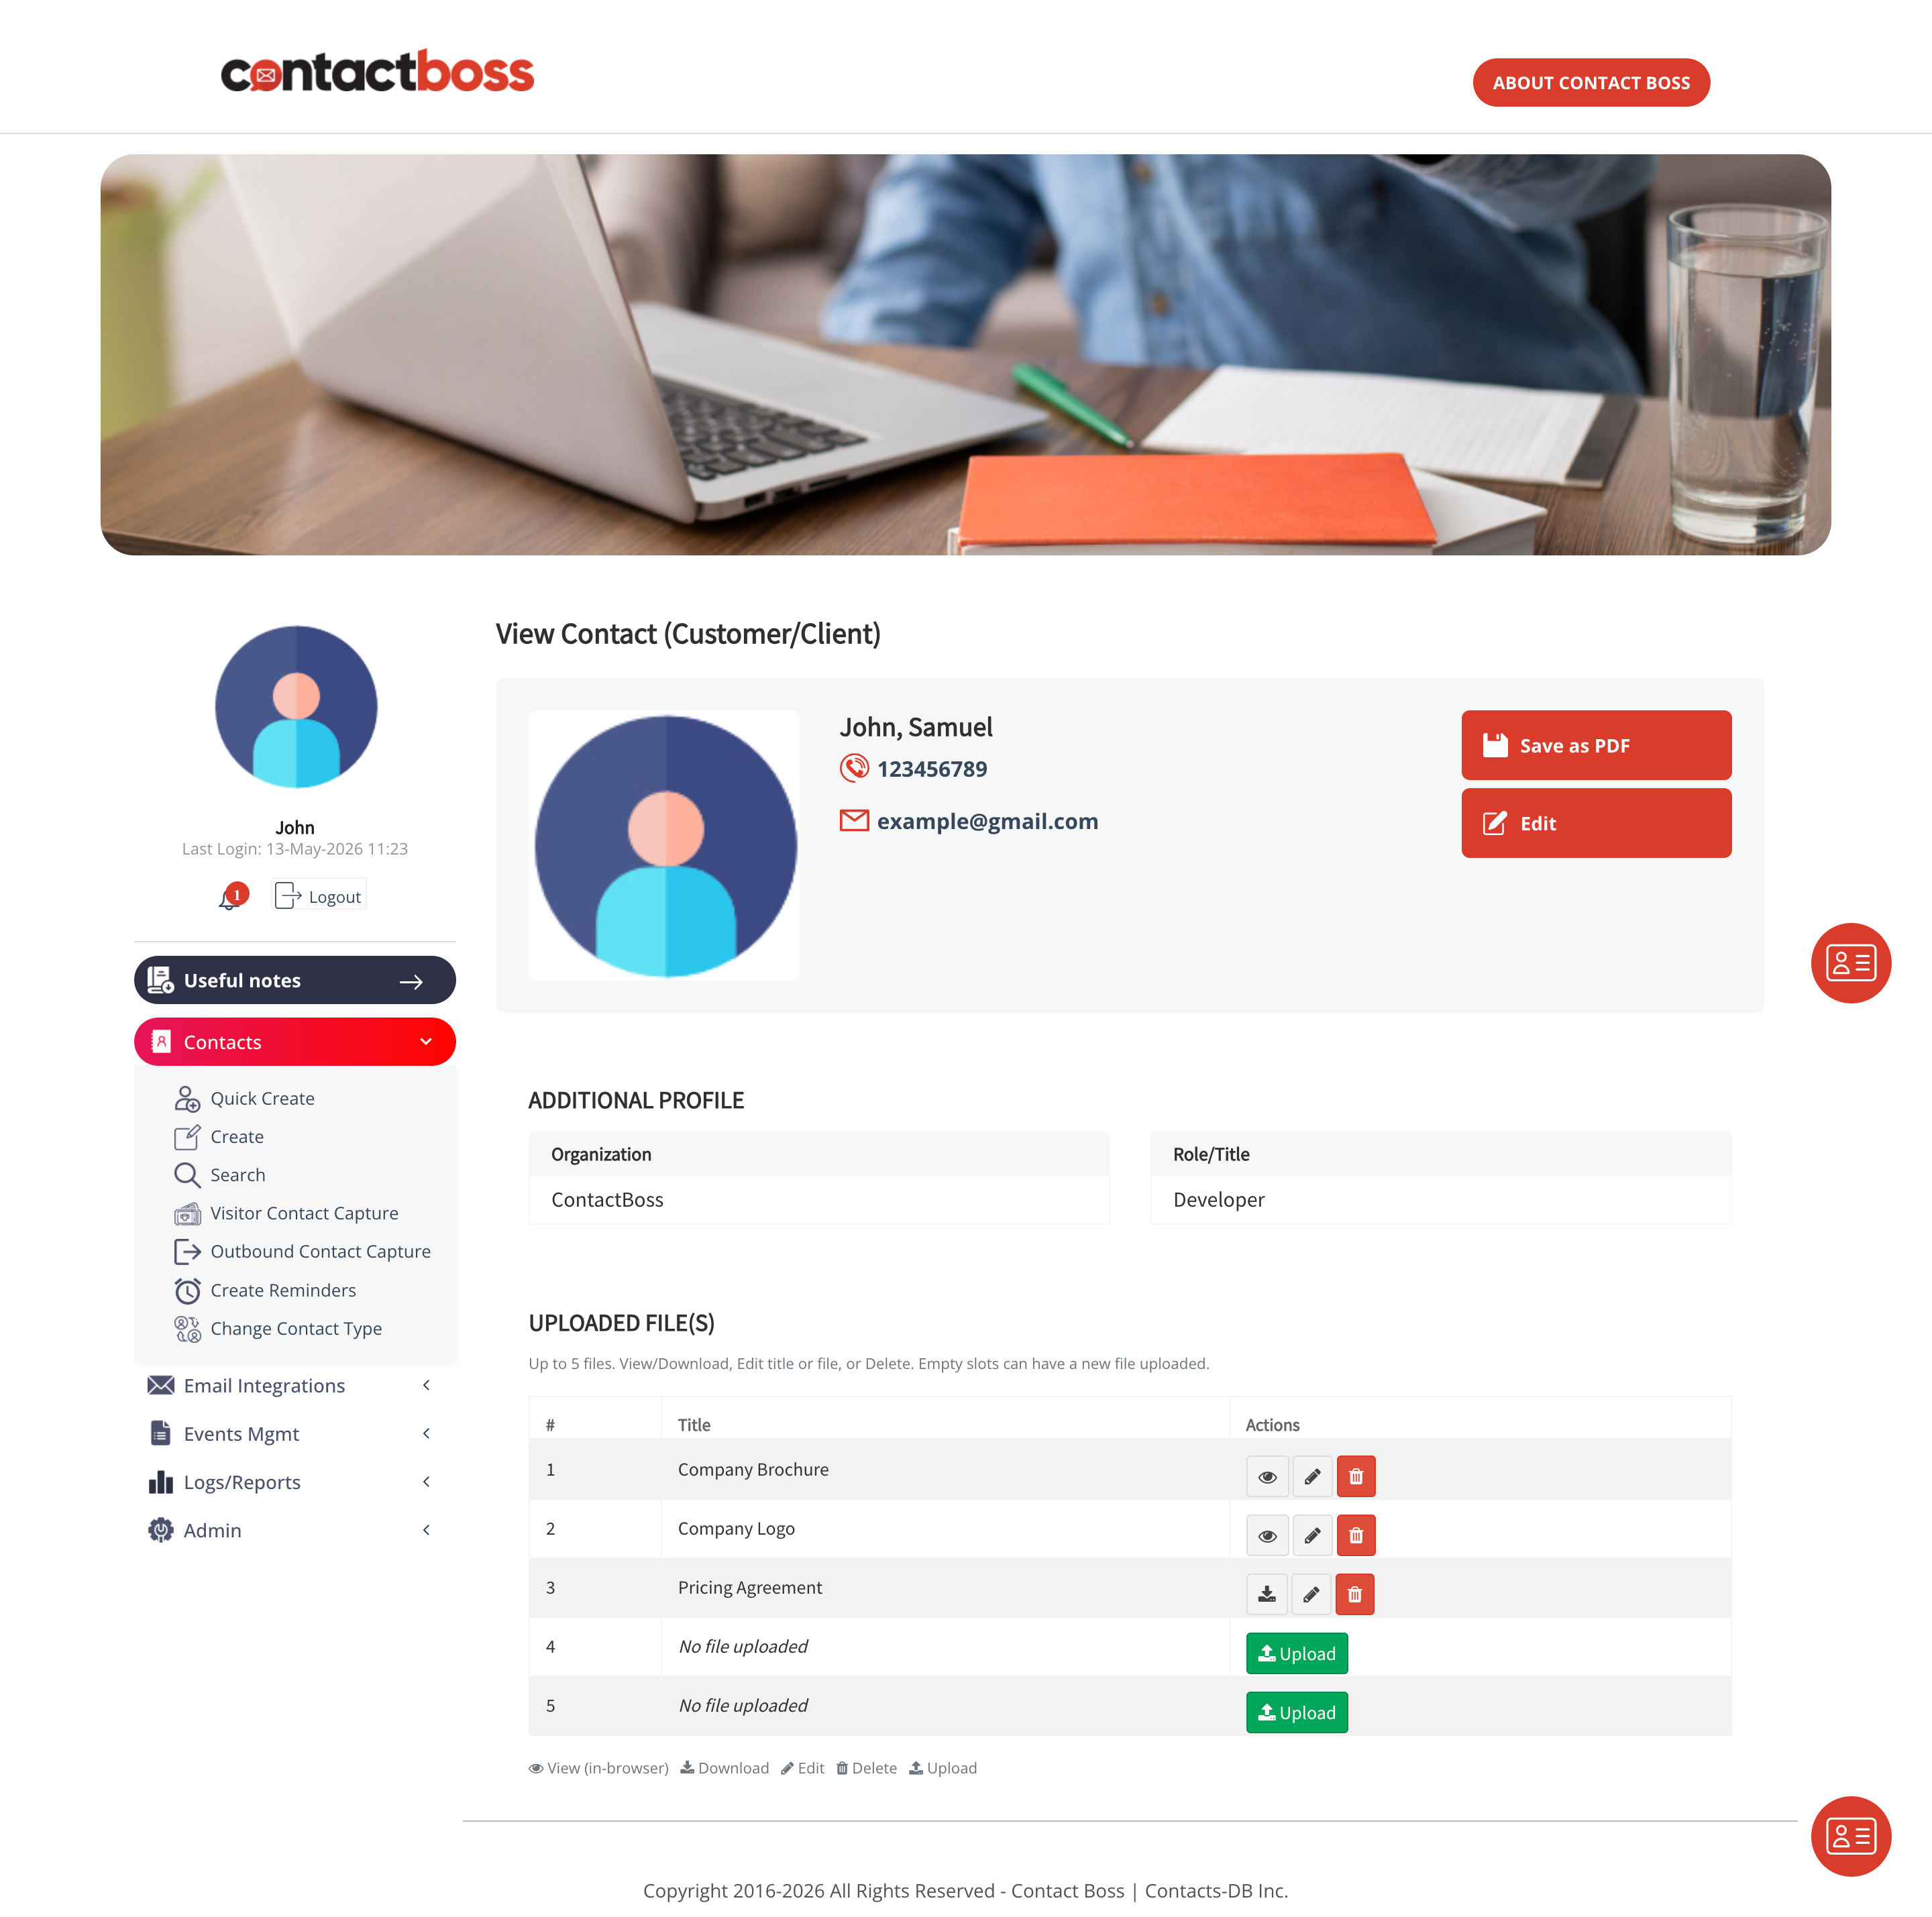
The File Manager feature allows users to upload and manage files directly within each contactprofile.
Upload up to 5 files per contact
File types: pdf, jpg, jpeg, png, gif, doc, docx, pptx, xlsx, odt, csv
File size: 10MB per file
Once you have completed the creation of a list using the <Search> tool, you will find that you have the option to <Sort> your list. This could be very useful as you review the names and ensure that the correct records are included. Simply use the <Advanced Search> to develop the list, and then choose <Sort> to organize the list by Name, Contact Type, Date Created, or Privacy setting.
For instance, you may wish to see all the contacts that are categorized as Employees first, followed by Suppliers. Or you may wish to take a look at your list in the order in which they were added to your database giving a sense of which clients have been long-term contacts and which are newer. You can order the sorted list by Ascending or Descending.
It is always a challenge for organizations to ensure that records are not duplicated in their database, but the robust Search tool in Contact Boss makes it easy to check records for duplication. Just enter a simple term such as first name in the <Search by any keyword> bar, and every record in your system which includes that name will be delivered. From there it should be a simple matter to define if any duplicates exist.
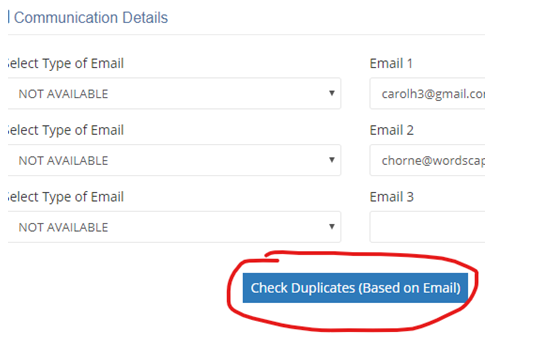
You can also check for duplicates when you have opted to “edit” a contact record in your search result list. A box will invite you to <Check for Duplicates> based on email address, which will be very helpful for identifying any double entries that may have been added by mistake as long as the email address is the same in both records..
Planning an event gets a lot easier with your Contact Boss Event Manager tool. Before you host your next business or organization event, create a form to capture the names of those planning to attend. With Contact Boss you can build your next event page right on your website - there is no need to use a third-party tool. It will also be very convenient to create further events, as you will find it simple to duplicate the basics of your last event, customize for the next, and off you go!
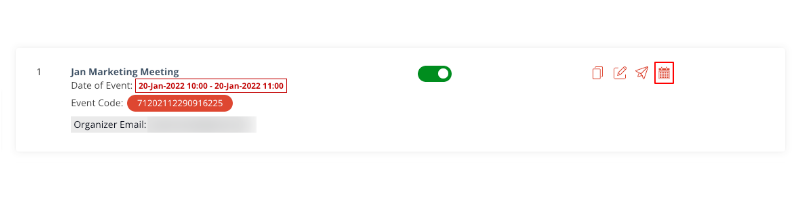
Choose <Create Event> from the <Enquiry/Event Mgmt> menu and get started. You can create and manage your event in just three easy steps. Begin by entering the basic information about the event: the event title and the address where the RSVPs will be delivered. Then enter the web page address (redirect URL) to which your guests will be delivered once they have registered for the event; be sure to include the http:// or https:// by copy-pasting the address of the page. Once the guests have registered, they will land on this web address.
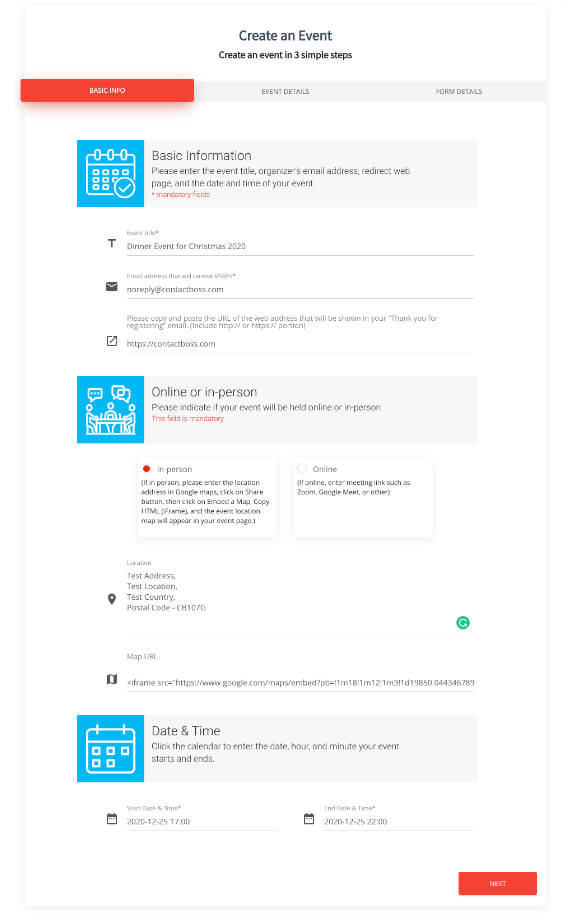
So many meetings are held online these days, and this event manager allows you to select either online or in-person event location. If online you can add in the Zoom or Google Meet (or other) link. If the meeting is in person, enter the address, and if you like you can add a map by entering the address at Google Maps, then click on Share button, Embed a map, enter the HTML code and the event location map will appear in your event page.
Select the event date and time - note that start and end time can be set in five-minute intervals. There will be three clicks on each calendar to set the full meeting start and end time.
Now in Step 2, you can dress up your event page with images, text and video! It is easy to choose the main banner image from your files. Compatible file formats are JPG, JPEG & PNG. Also, the preferred image size is: 1600px wide by 570px high for the banner.
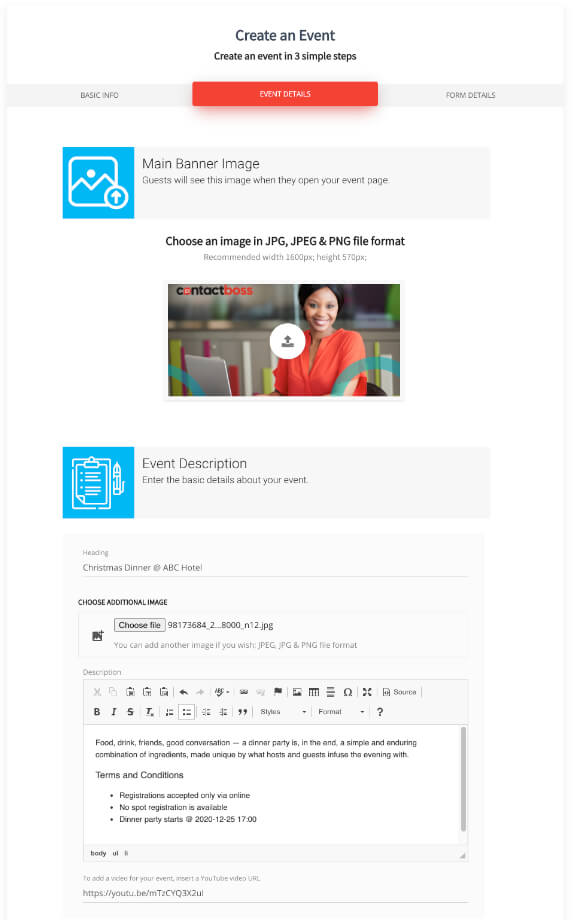
Continue with your event description text and then you can also add a video by inserting a YouTube URL.
This form has the ability to include more information about your event, your products or your company -with options to add more images, text or video before you go on to the Step 3 which is to build the registration form.
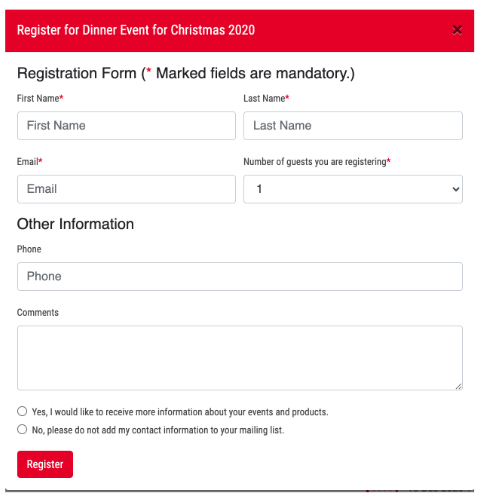
Use the event manager to define the information you want to capture in your registration form including the event title and the maximum number of registrants, which is pre-set to 50, but you can limit the number according to your requirements. You can also choose which of the following fields should be included in the registration form: First and last name, email address, phone number, the number of people being registered by the user, the name of the organization, the role of the registrant, and room for comments if you wish.
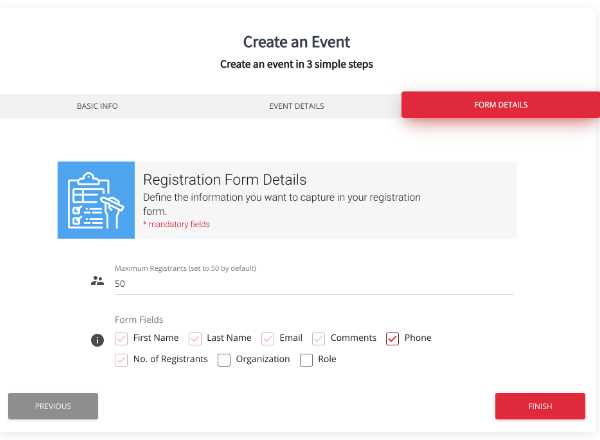
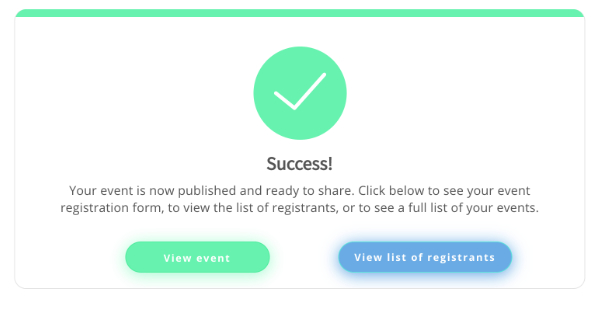
Once you have completed Step 3, your event will be published at your Contact Boss database site and the registration page is ready to share.
At this point you will have the option to view the event, see the list of registrants you have created so far.
Please note that Contact Boss offers integration with an automation tool that helps transfer data between applications. Once you have built your event using the convenient Contact Boss event management tool, you can click on
Please note that there are a limited number of “tasks” offered via Zapier, and each interaction counts as a task, i.e. if you use more than one calendar and have registered them at your Zapier account, each calendar transfer will count as one task – see Zapier’s official site for details.

A registration form will be generated, and it will include "opt-in/out" check-boxes.
You will now be able to track RSVPs, as well as record who attended after the event.
At some point your relationship with a contact may change (a volunteer may become a member, or a client could become a volunteer etc.) Or perhaps the Type was not selected or an error was made at the time of data entry.
It’s simple to change the Contact Type for individuals by using the menu on the left, choosing <Change Contact Type>, and selecting the current type of contact from the drop-down menu. Then enter the name of the contact (or select from options provided). It is possible to change all the contacts for individuals in the list to a new Contact Type if desired, but it is not possible to change Contact Type for organizations or groups. Finally, select the new <Type of Contact> and <Submit>.
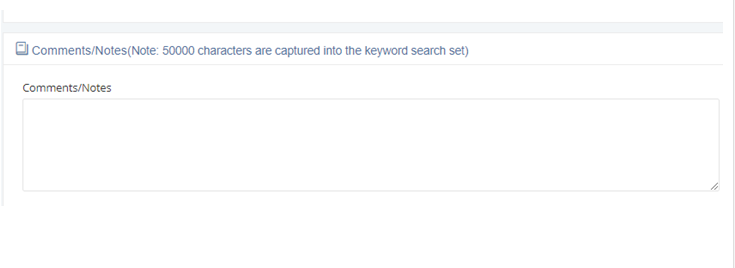
Contact Boss is a great tool for sales representatives, or anyone who meets many people every day. By taking the time to record notes on your conversations, you can make real connections by remembering small details later on.
You can take notes on:
Before a call or outbound visit, take the time to reference your notes. Knowing what
matters to your client just might make a difference to the sale! The notes field is
found at the bottom of the
Bulk / CSV import is only available on Pro, Premium or Enterprise editions of Contact Boss, so if you are using Contact Boss Demo, we invite you to upgrade in order to import your existing list.
To import contacts into Contact Boss, select the Import option from the left-hand menu located under the Admin menu. Your existing database needs to be configured using one of the supplied templates, uploaded and mapped accordingly. Failing to do this initial setup can result in data mis-matches, so it’s important to do this step carefully.
Select <import> from the <admin> menu
Choose the appropriate template file and download it (you will need Excel, Google Sheets or another spreadsheet application to do this step)
Copy / paste the data into the appropriate column in the template file
Next, select your contact type. (This must match the template you downloaded)
Example: Employee database> download Employee template> select Employee as Contact Type
Select <next>
Read the warnings carefully and ensure that your data is in the correct format by selecting <view country/state code format>
Select <next>
Once your database template is filled with your data, save your file as a CSV.
Give your database a title, and use the file selector to upload your file.
Select <upload>
Next, map your columns: To do this, refer back to your csv to ensure that the fields in your csv file match the fields/labels given. Click <save>. Please note your confirmation message indicating that all imports are correct, and resolve any rejections or defects to prevent database errors.
If your business regularly receives visitors or callers, you can capture contact information and send alerts to your internal staff. This is especially helpful for sales teams. This function allows you to tag the visit or call on an existing client contact record, or create a new one.
To record a visit/call, select <Visitor Contact Capture> in the left-hand menu. Begin to enter the contact name in the Visitor/Caller record field. If a record exists for that person, you can select it from the drop-down options, and note the existing file. If no record exists, you can create a new one by entering their name and contact info in the available fields.
Next, alert the person internally who is being requested by entering their name into the field <who to connect>
You can also select the purpose of the call, the location if applicable, and any additional comments.
If the visitor chooses to wait, or the caller is placed on hold, leave end visit/call selector unchecked to leave the record open.
Just as you can track and record visits and calls into your business, you can make detailed records of outbound activities. This can be very important to sales teams or volunteer organizations. Recording client interactions helps to track outbound activities so success can be measured against these initiatives.
Select <Outbound Contact Capture> from the left-hand menu. Next, enter the contact information, and note whether you are calling or visiting. Additionally, you will need to select the person within the organization who is making the outbound contact, their location (if applicable) and the reason for connecting and click <Submit>. You can also record comments to track more details on the outreach activity.
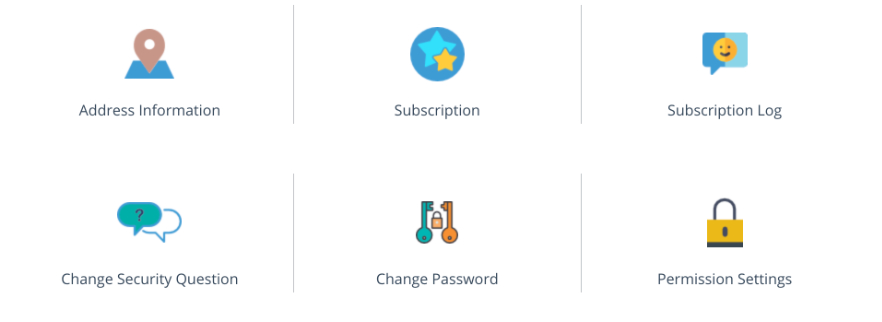
Contact Boss allows account administrators to control who accesses the software and what interactions are permitted. To manage access for your team members, simply log in, select the ADMIN menu and choose My Account. From there you will have a number of choices. Once you have clicked on Permission Settings, you will notice as an ADMIN that all boxes are checked green for all types of actions for all types of contacts - it is recommended to retain the full access permission setting for Administrators.
However, you may wish to limit the ability of some users to change or edit the contact info. To manage this, you will be able to assign to a user one of three levels of access (Category A, B, C) with varying levels of authority that you can define at this screen. For example, you may decide that users with category "A" access may only add new contacts - to set this, simply check all the boxes under <ADD NEW> or check the boxes for only the types of contacts you wish User A to be permitted to add. As another example, you can define user "B" (perhaps your sales team) access to Add, Edit, View or Delete only the Client type category. In this case the actions are available only for contact type "Client."

In another example, perhaps you wish a member of your support staff to be able to access and modify the contact information for your partners and suppliers and members, but not have permission to view or modify the other types of contacts such as employees and funders. Simply open the <Permission Settings> grid and check only the relevant boxes.
You will note that there is a wide range of options for permission settings for User types A, B and C. In this way you have better control over data management with only qualified users accessing or changing contact details according to pre-set permissions.
An ADMIN at Contact Boss can also modify the User category at the Search results page using the edit icon. By clicking on the modify user button you can at this location change the user’s permission to allow access as ADMIN, or level A, B, or C. For example, if your Contact Boss subscription includes 10 users, and seven of your staff have access, you may want to allow a volunteer limited access under your subscription, which can be defined or limited by the A, B or C categories.
Copyright © 2026 All Rights Reserved - Contact Boss | Contacts-DB Inc.